
This homemade salted caramel sauce is quick and easy to make! It comes together in 15 minutes with just 5 ingredients. It's thick and gooey once cool and perfect for drizzling on top of ice cream, brownies, cookies, a salted caramel cheesecake, caramel chocolate cupcakes, and more.

This salted caramel sauce is sweet, thick, buttery, and comes together in 15 minutes with just 5 basic ingredients! It tastes incredible on everything. Drizzle on vanilla cupcakes, on top of a salted caramel chocolate cake, or in your coffee. It also makes a great gift!
Making caramel at home can seem a little intimidating at first, but I promise it's so easy! All you have to do is melt down sugar until it caramelizes, add room temperature butter and heavy whipping cream, and stir, stir, stir.
Unlike most caramel recipes, this one is foolproof and doesn't require a candy thermometer! All you have to do is follow the instructions and carefully watch the sugar as it caramelizes to determine when to add the next ingredient.
For more sauce recipes, check out this cherry cake filling and strawberry cake filling.
Jump to:
Ingredient Notes
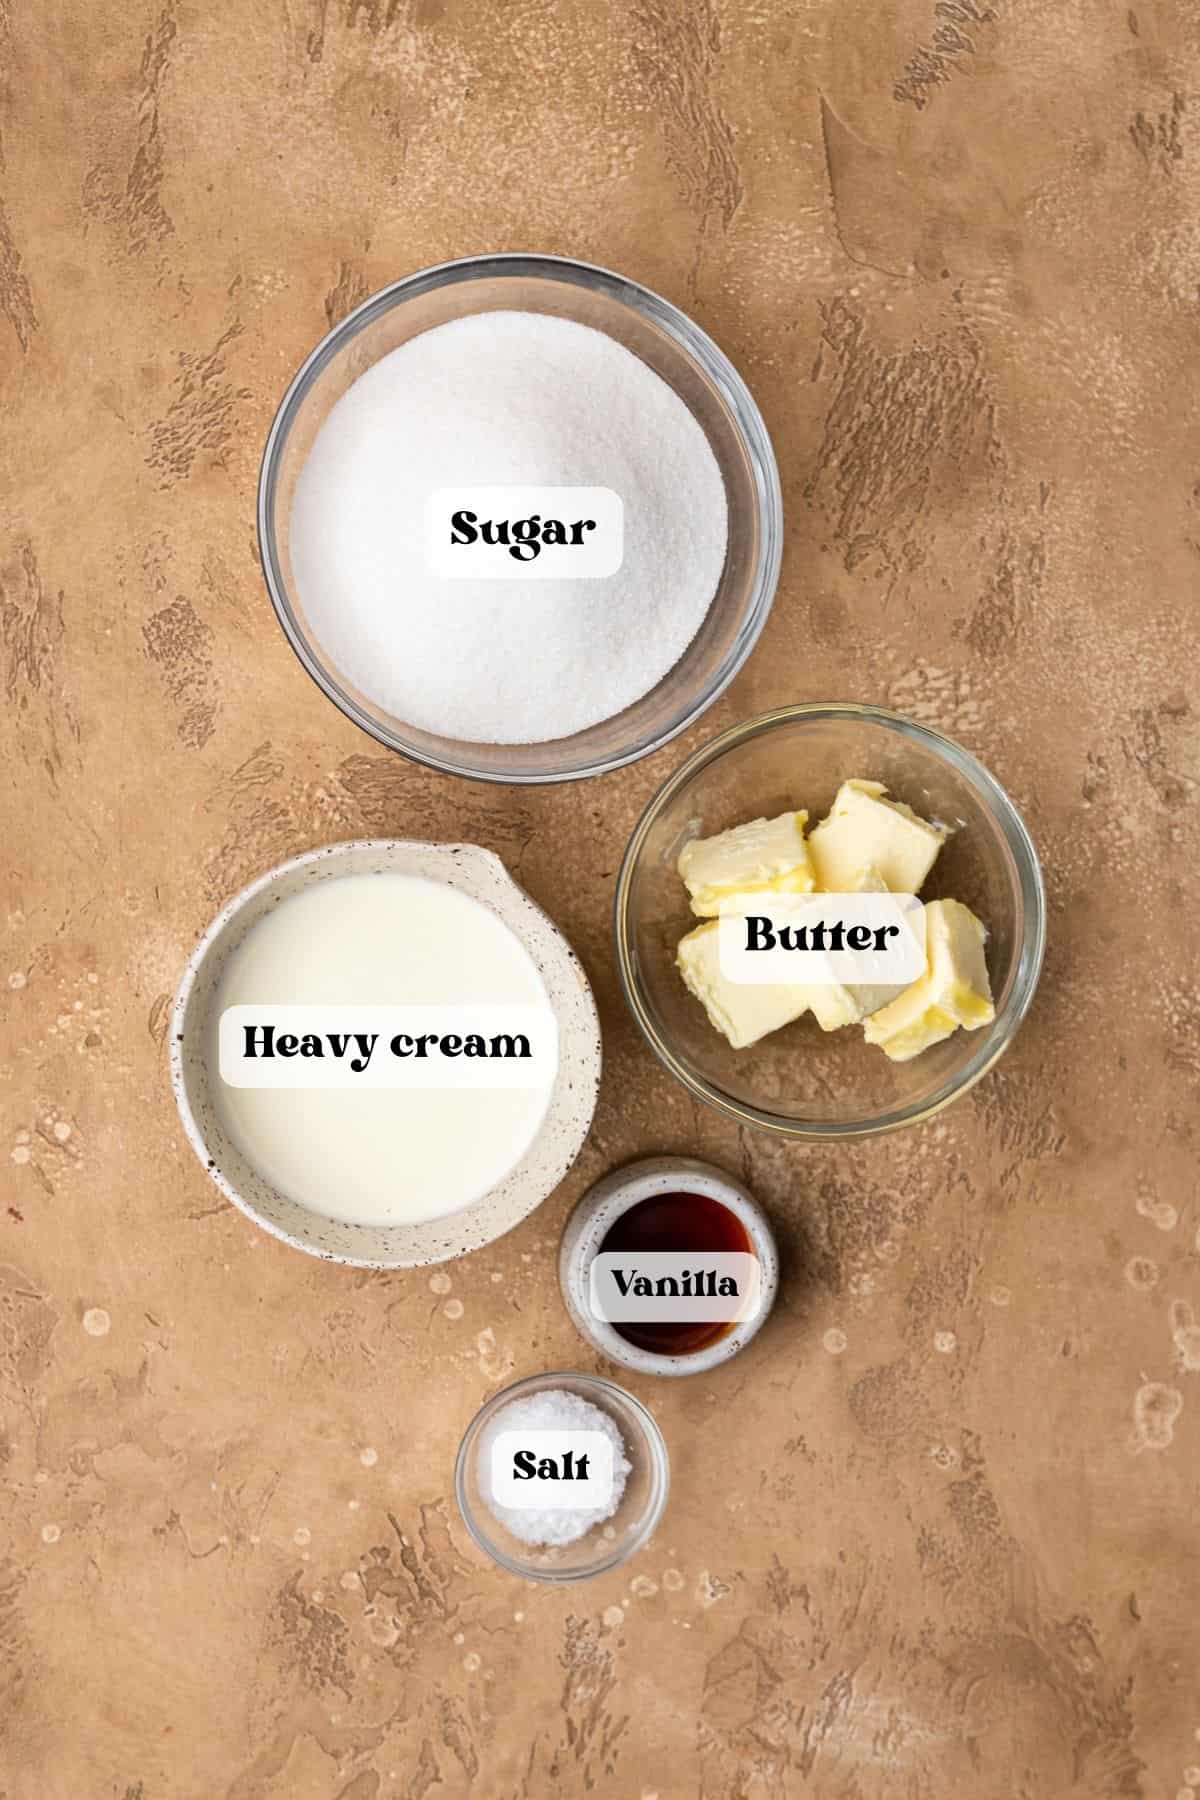
- Granulated sugar- White granulated sugar will have the best results. You can also use cane sugar. If you melt down brown sugar, you'll end up with butterscotch instead of caramel!
- Unsalted butter- I prefer unsalted butter so I have full control over the amount of salt. The butter has to be room temperature so it doesn't shock the cold sugar. Take it out of the refrigerator about an hour before you start and cut into cubes it so it's easier to mix in.
- Heavy cream- Full fat heavy cream creates the best thick and rich consistency. If your cream is too cold, it will shock the sugar and make it sieze up, so make sure to take it out with the butter to reach room temperature. Do not substitute half and half or milk because they aren't thick enough for making caramel.
- Vanilla extract- A splash of vanilla adds a little extra flavor. You can also use vanilla bean paste.
- Salt- I recommend sea salt flakes, like Maldon. It looks super pretty sprinkled on top and has great flavor and a little crunch.
Substitutions and Variations
- You can use salted butter instead of unsalted if necessary. Just make sure to leave out some of the extra salt and taste the caramel as it cooks.
- I haven't made this recipe dairy free, but you can try making it with plant-based butter sticks and coconut cream.
- Instead of vanilla, add a splash of whiskey, dark rum, or bourbon for a boozy, adult twist.
Helpful Equipment and Tools
Use a light colored sauce pan with a heavy bottom. You'll be able to see the color of the sugar in a light colored pan, and the heavy bottom keeps the sugar from getting scorched. Stainless steel or non-stick work best!
Step by Step Instructions
Make sure your butter and cream are room temperature before you start!

Step 1: Add granulated sugar to a clean, dry pot. Cook over medium heat on the stove, stirring slowly with a wooden spoon or rubber spatula. Try to keep the sugar from hitting the sides of the pan.
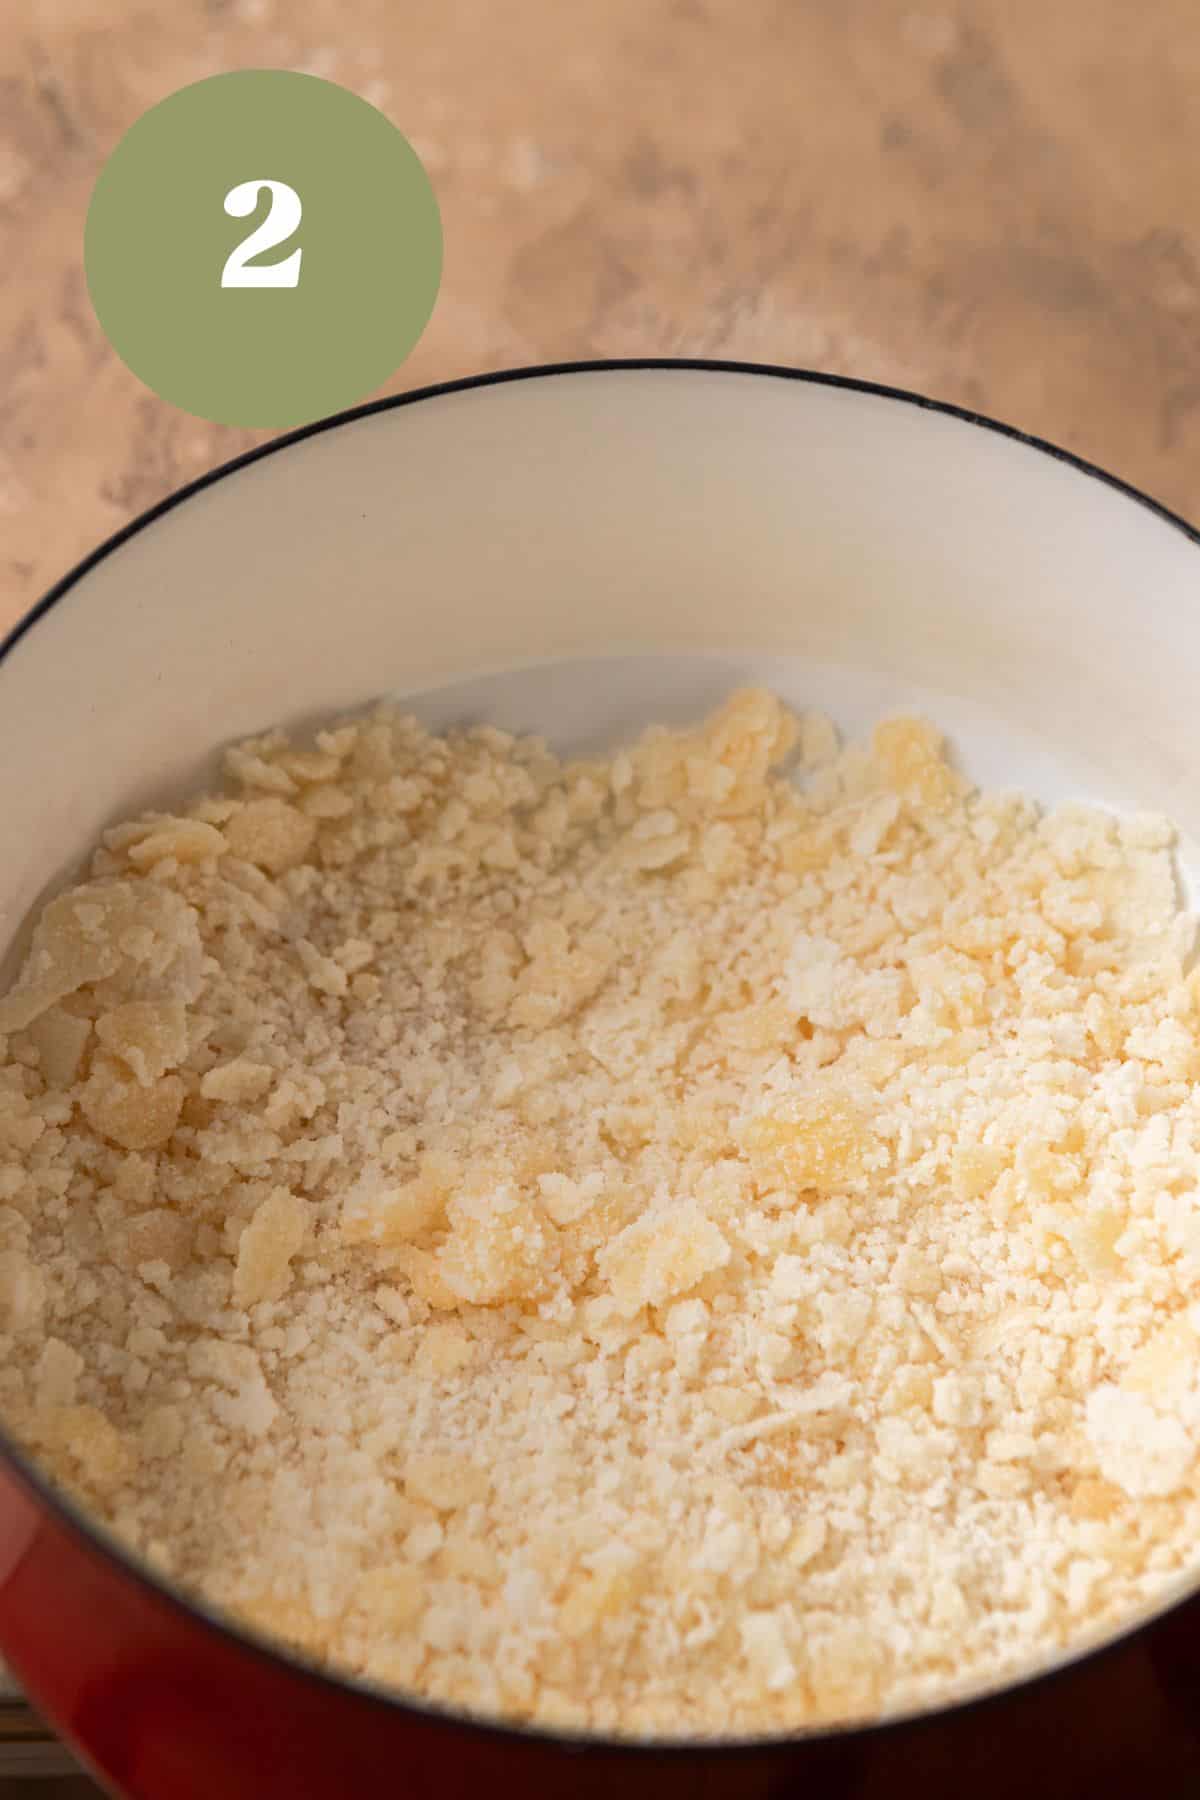
Step 2: After 3-4 minutes, the sugar will start to clump and turn a golden color.

Step 3: After 2 more minutes, the clumpy sugar will darken even more and start to melt and break down. Keep stirring lazily, avoiding the sides of the pan. If the sugar hits the sides, it'll melt and cool quickly and crystalize. This can make the rest of the caramel grainy.

Step 4: After 2 more minutes, the sugar will be completely melted and turn an amber color. Make sure the chunks all melt completely or the salted caramel could seize up when you add the butter and cream.
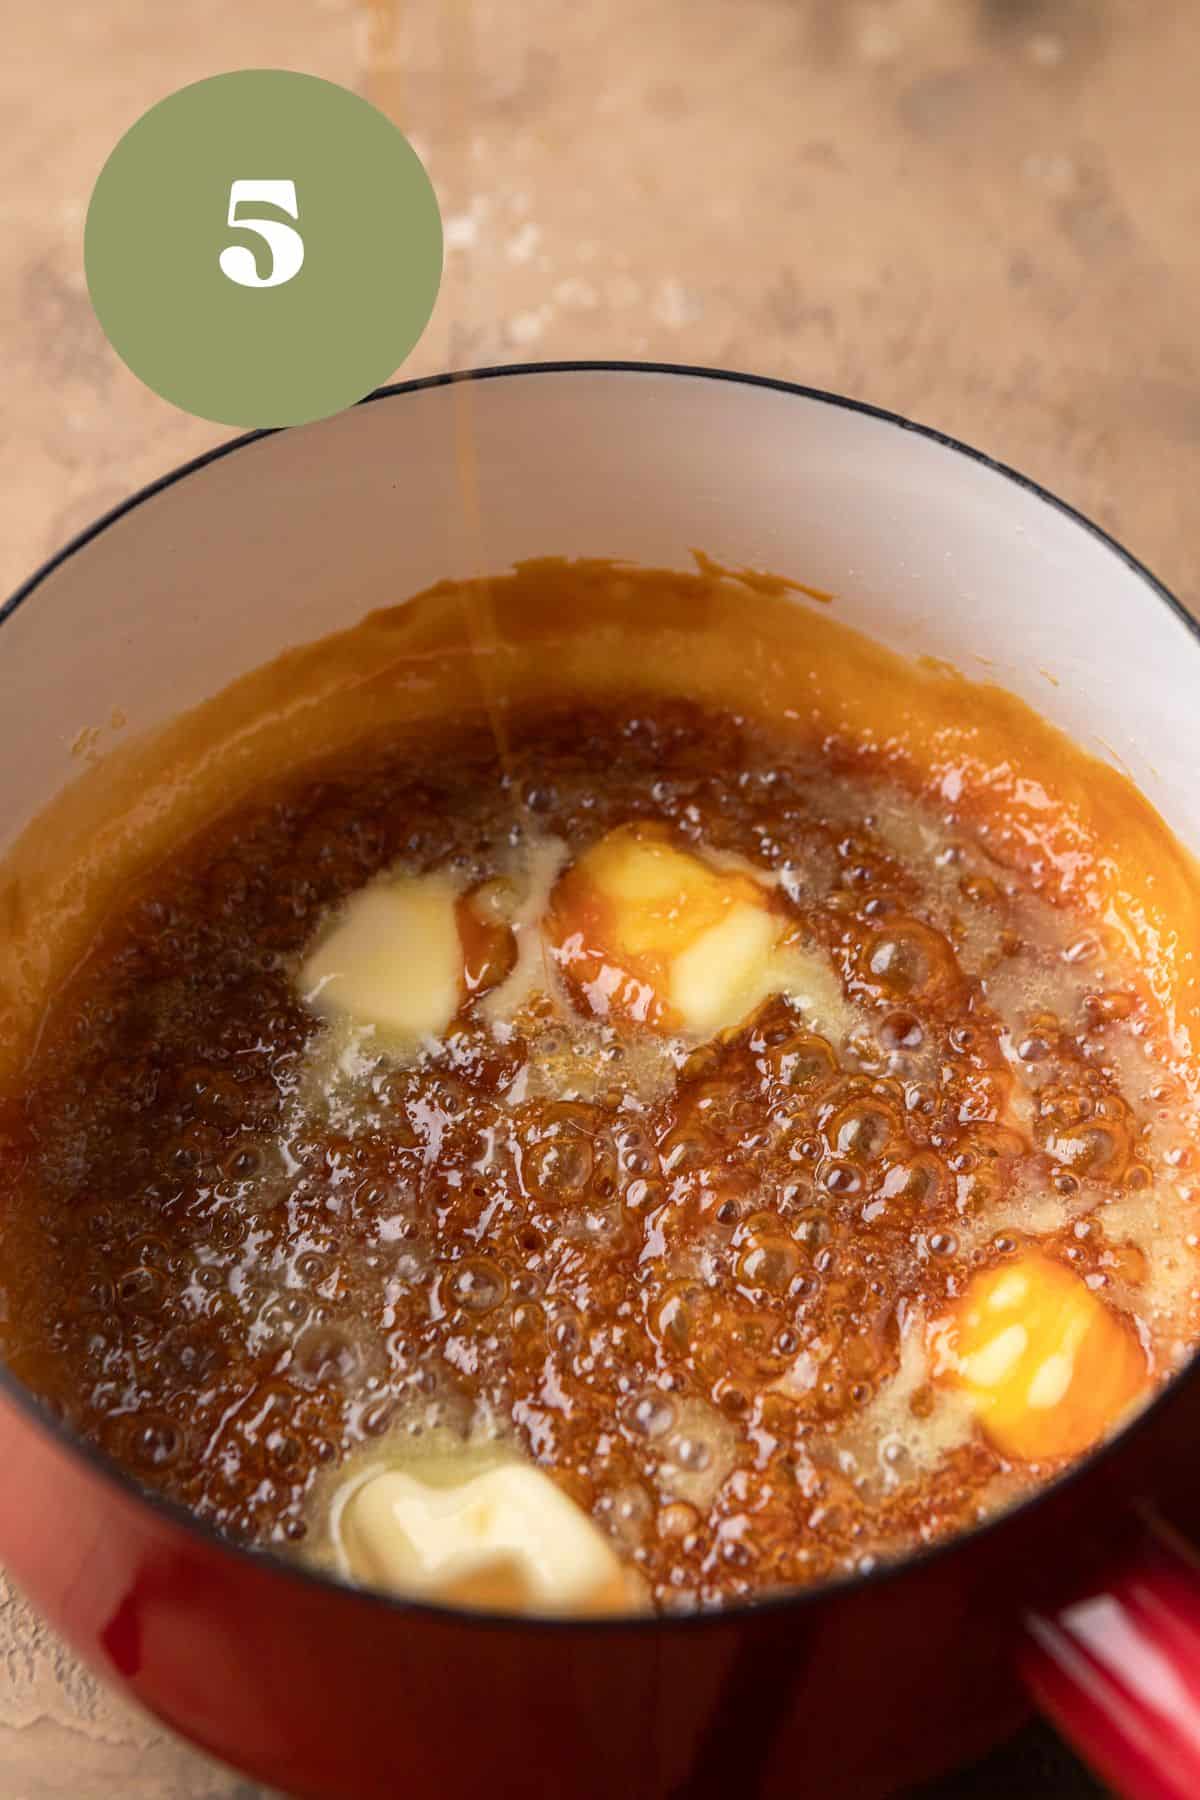
Step 5: Next, take the pot off the heat and add the cubed butter, whisking vigorously. It's normal for the caramel to bubble like in the photo! It's also ok if the butter looks a little separated, just get it mixed in as well as you can.

Step 6: Next, whisk in the heavy cream. It may bubble at first but will come together into a thin but luscious texture. Mix in the vanilla and salt.
Note that it's normal for the sauce to stiffen a bit when the butter and cream are added, so it's important to whisk quickly and keep it moving!

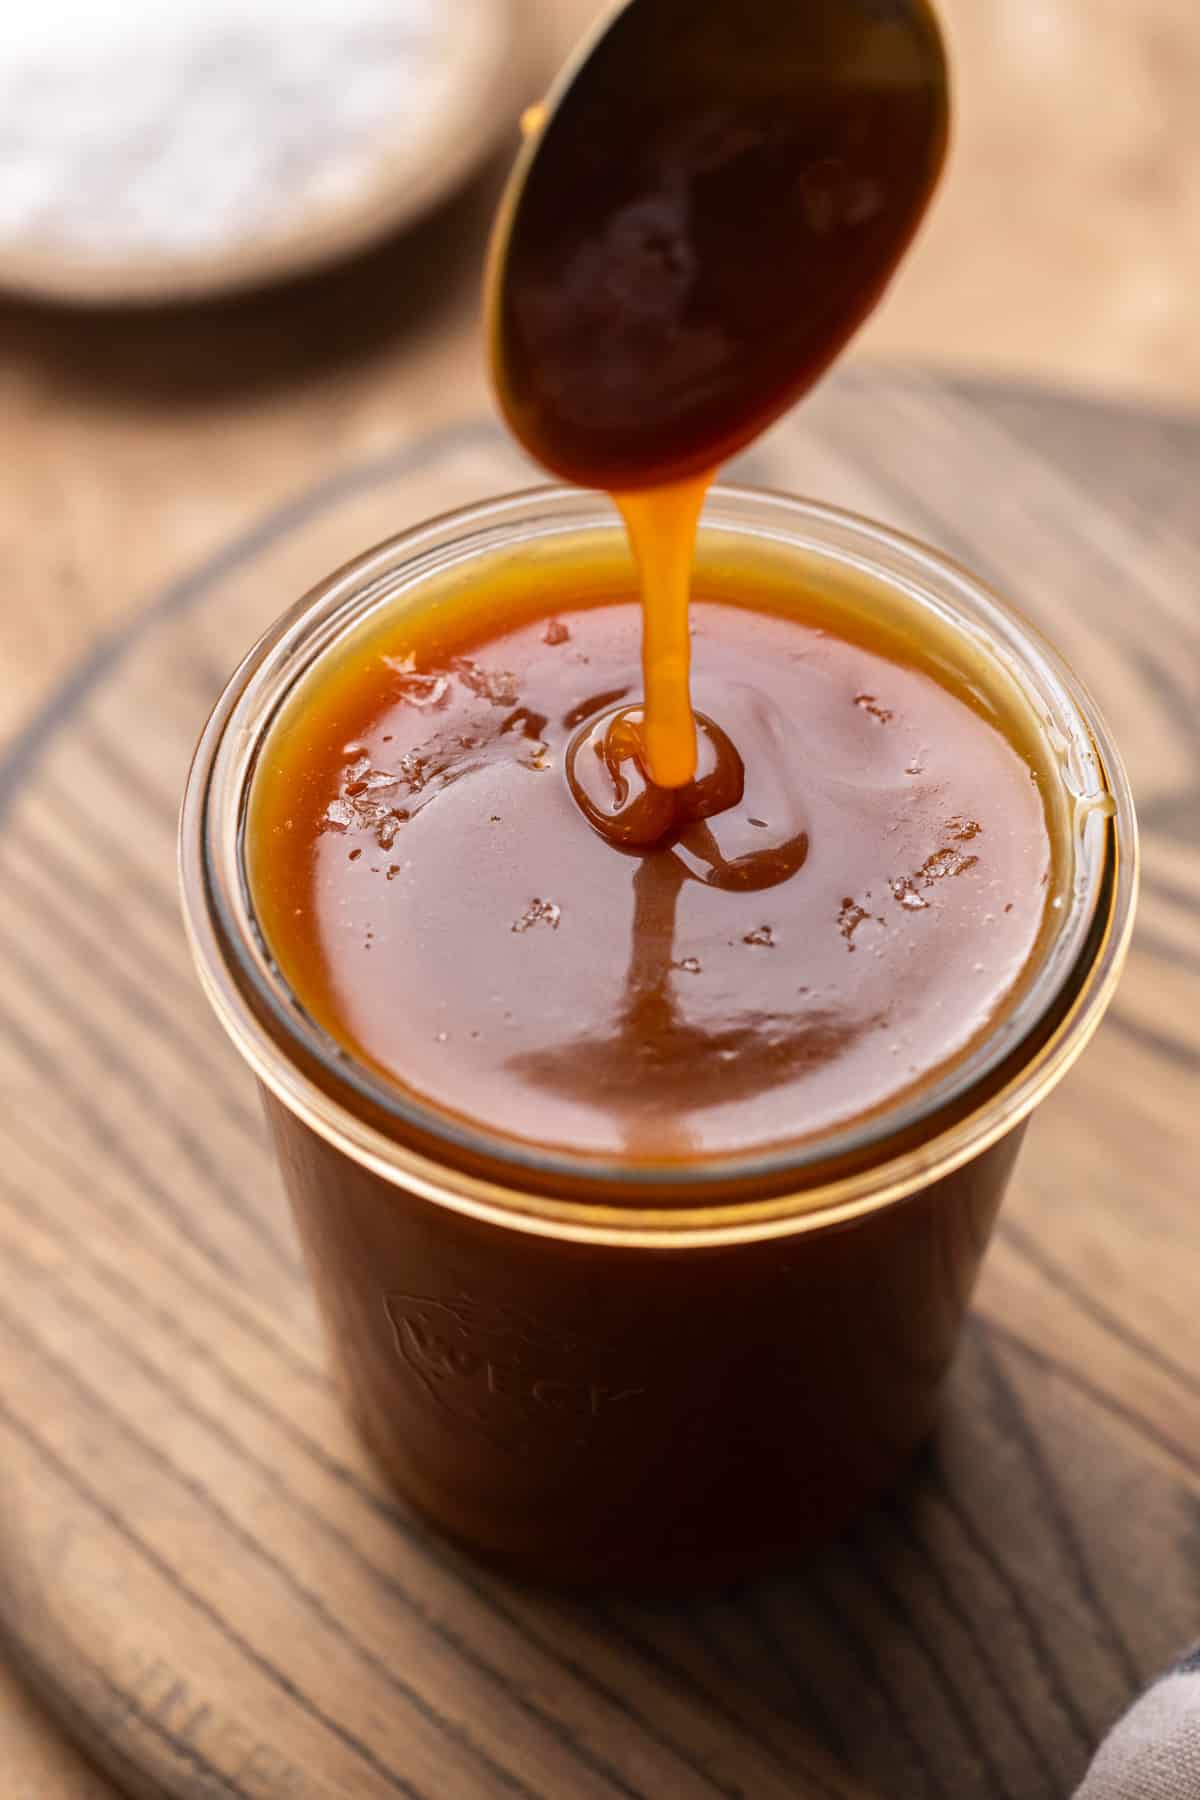
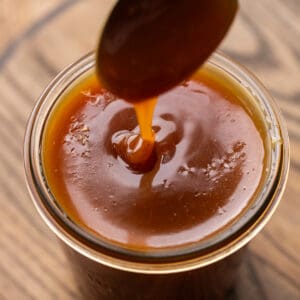
Step 7: Pour the hot salted caramel into a glass jar with a lid. It will be very thin and liquidy at this point but will thicken as it cools. Let it cool at room temperature for 30 minutes, pop on the lid, and refrigerate until it's completely cool.

Step 8: Now your salted caramel sauce is ready to use! Refrigerate longer for a thicker texture or microwave for 30 seconds to return to a pourable consistency.
Expert Tips for Success
- Use room temperature butter and heavy cream. These ingredients need to be room temperature or they'll make your caramel crystallize!
- Don't step away from the sugar. At first, it takes a while for the sugar to break down, but once it starts to melt, it goes quickly! The sugar can rapidly go from amber-colored to burnt, so don't step away.
- Keep the sugar moving. You need to continuously stir the sugar so it doesn't seize up, but make sure to do it gently, avoiding the sides of the pan. If the sugar hits the sides, it'll melt and cool too quickly, causing it to re-crystallize. This can cause a chain reaction and make the rest of the sauce grainy!
- Add the salt while the caramel is still hot. If the caramel sauce is slightly cool, the flaky salt won't dissolve fully and you might find some chunks in it.
How to Use
- Drizzle over cupcakes, brownies, salted caramel oatmeal cookies, caramel banana bread, or cheesecake.
- Use as a dip for apples and other fruit.
- Swirl it into frosting to make salted caramel buttercream or cream cheese frosting to spread on a banana caramel cake.
- Mix with heavy cream and white chocolate to make salted caramel ganache.
- Stir into hot chocolate, coffee, or use it to make a caramel latte or macchiato.
- Let it harden a make caramel filled cupcakes or use to stuff cookies!
Frequently Asked Questions
This recipe makes a little under 2 cups of caramel, about 14 ounces. This is about 8 servings!
Caramel sauce gets grainy if the sugar recrystallizes. This can happen when some liquid sugar splashes up onto the sides of the saucepan and crystallizes when it cools. If this touches the melted sugar, it makes it seize up and turn grainy.
Carefully mix your sugar, gently swirling it and trying not to get any on the sides of the pan. You'll have perfectly smooth caramel!
More Frostings and Fillings to Try


📖 Recipe
Easy 15-Minute Salted Caramel Sauce
Equipment
- 1 glass jar with lid
Need Metric or US Customary Measurements?
Use the buttons below to toggle between grams and cups!
Ingredients
- 1 cup granulated sugar
- 6 tablespoon unsalted butter room temperature, cubed
- ½ cup heavy cream room temperature
- 1 teaspoon vanilla extract
- 1 teaspoon salt
Instructions
- Add the granulated sugar to a clean, dry pot. Cook over medium heat on the stovetop, stirring slowly with a wooden spoon or rubber spatula. Don't let it hit the sides of the pot.1 cup granulated sugar
- The sugar will clump and turn golden. After a few minutes, it will start to melt and break down. Keep stirring until it is completely liquid and an amber color.
- Take the pot off the heat and add butter. It will bubble viciously. Stir until the butter is mostly mixed in.6 tablespoon unsalted butter
- Pour in the heavy cream and immediately whisk it in. Once fully combined, whisk in the vanilla and salt.½ cup heavy cream, 1 teaspoon vanilla extract, 1 teaspoon salt
- Pour the hot salted caramel into a glass jar. Let it cool for 30 minutes at room temperature and it's ready to use! Pop on the lid and store in the refrigerator for up to 1 week.


Sara
A video of this recipe popped up on my insta explore page last night and I decided to try it out... It was so quick and easy to make (the step by step pictures were so easy to follow and understand) and it turned out AMAZING. I didn't have unsalted butter so I used room temp margarine and it worked out just fine. I tried it this morning with my coffee and it turned out pretty good and I really liked how the saltiness brings all the flavors together. Can't wait to try it with cookies!