
This moist chocolate cake with cream cheese frosting is a classic you'll want to make over and over again. The cake has an intense chocolate flavor and the tangy cream cheese frosting compliments the richness perfectly. The entire cake is easy to make in a little over an hour!

Chocolate, cream cheese, and cake are a match made in heaven. The combination inspired my brownies with cream cheese frosting, gingerbread cake with cream cheese frosting, naked red velvet cake, and this cake too. Chocolate is rich and decadent while cream cheese has a slightly tangy flavor. Combine the two and you have this delicious chocolate cake with cream cheese frosting!
This cake is a variation of some of my most popular recipes- lemon chocolate cake and small batch chocolate cupcakes. It's basically the cake version of these chocolate cupcakes with cream cheese frosting! This cake is super versatile and can be made for any occasion or celebration, from birthday parties to anniversaries to baby and bridal showers.

There are a couple key reasons why you'll love this recipe. First of all, the entire thing is made without butter. Yup, you can get all that rich and decadent flavor without it! It's one less ingredient to pick up from the store.
Secondly, the cake is incredibly simple to make. The batter is made without a mixer and bakes up in about 30 minutes. Whip up the frosting and you'll have a completed cake in just over an hour!
If you're a chocolate lover, make chocolate banana cupcakes, mini flourless chocolate cake, or chocolate blueberry cake next.
Jump to:
- Ingredient Notes
- Substitutions
- Helpful Equipment and Tools
- Step by Step Instructions - Chocolate CAKE
- Step by Step Instructions - Cream Cheese Frosting
- Step by Step Instructions - Assembly
- Expert Baking Tips
- Additions & Variations
- Storage & Freezing
- Frequently Asked Questions
- More Cake Recipes to Try
- 📖 Recipe
- 💬 Comments
Ingredient Notes
Here are some notes about the ingredients used. For measurements and instructions, see the recipe card below.

Ingredients for the cake.
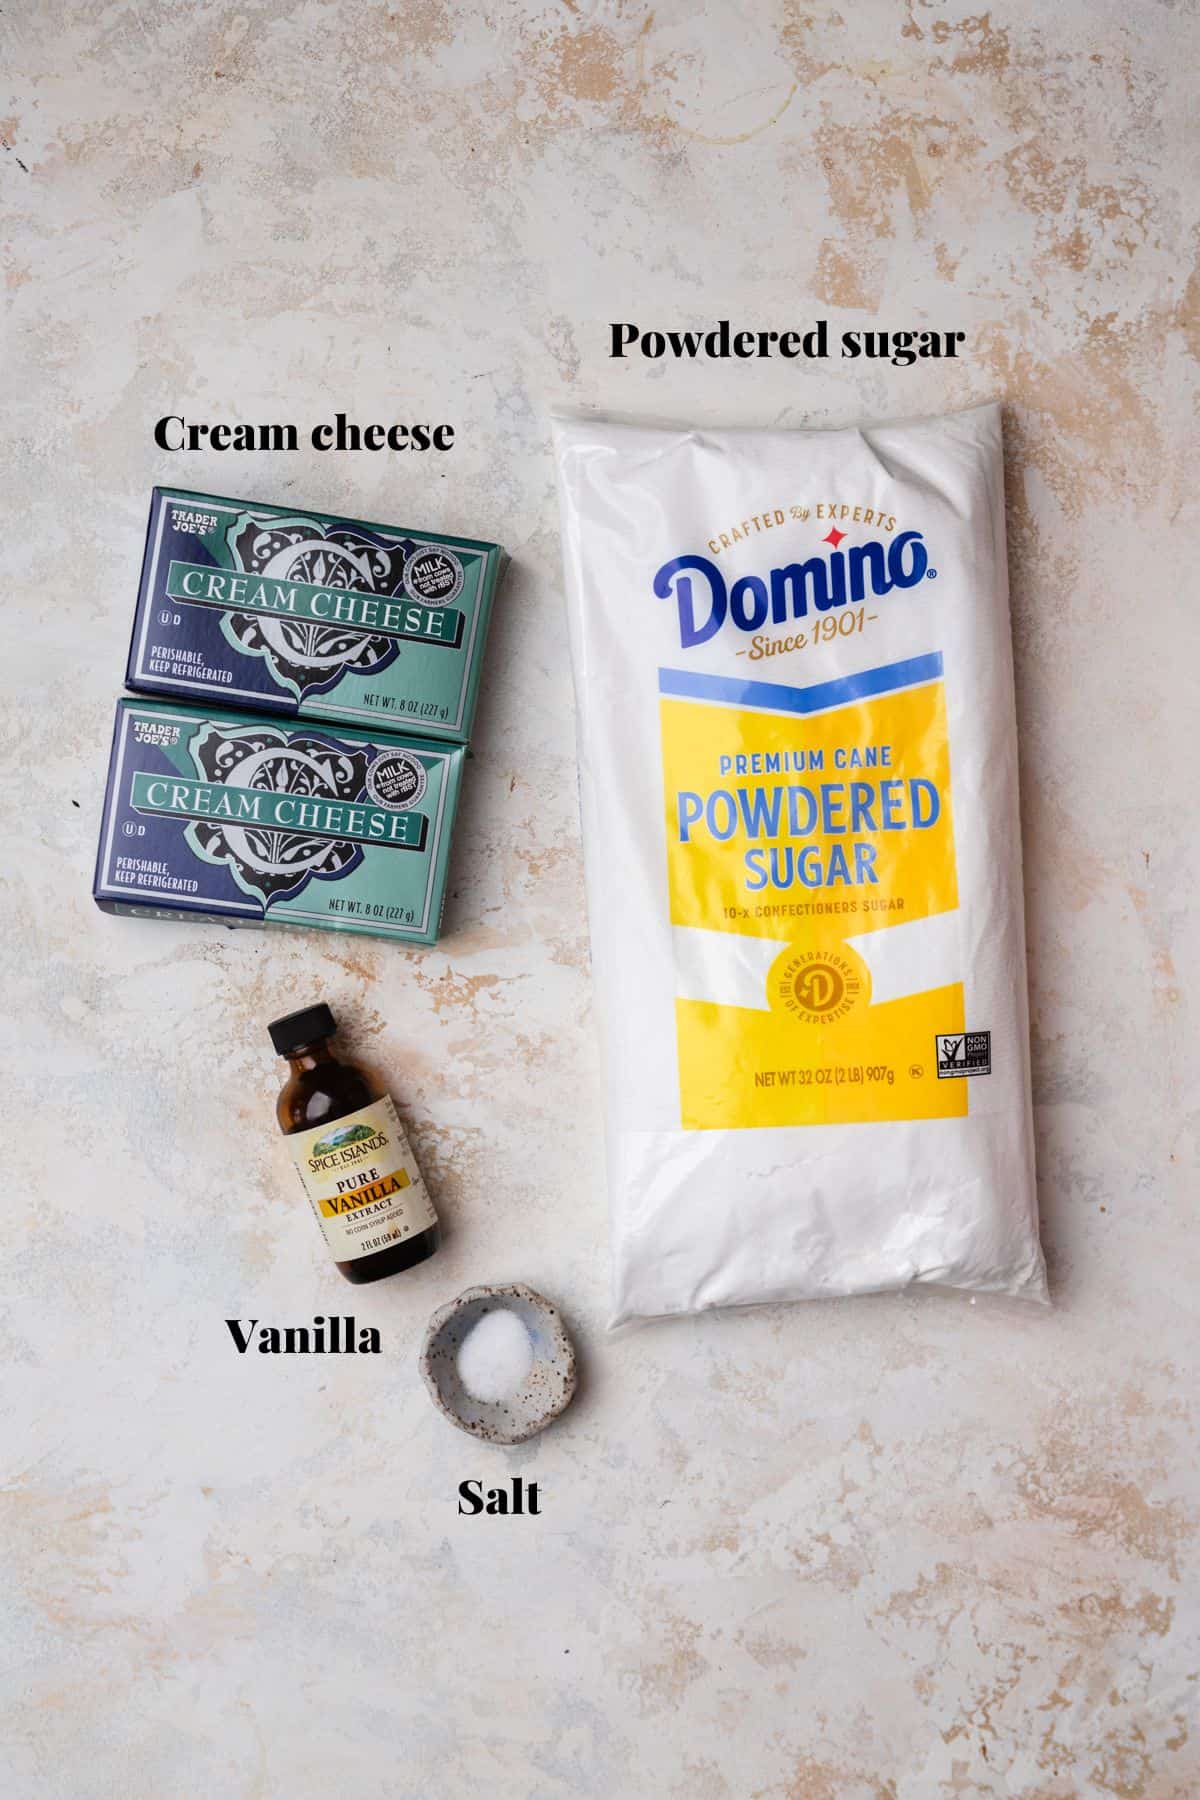
Ingredients for the frosting.
- All purpose flour- This flour makes up the structure of the cake and makes it sturdy yet soft.
- Granulated sugar- Sugar sweetens the cake and makes it stay moist.
- Cocoa powder- I prefer baking with Dutch-processed cocoa powder. This cocoa powder is treated with alkali, which reduces acidity. This process makes the color darker and the flavor more deep and smooth. Natural (or unsweetened) cocoa powder works in a pinch, but the color and flavor won't be as deep.
- Baking powder & baking soda- Baking powder helps the cake rise when it comes in contact with liquid, whereas baking soda helps it rise by reacting with acidic ingredients like buttermilk. Make sure these leaveners are fresh!
- Salt- Finely ground salt is essential in baked goods to offset the sweetness.
- Oil- Cakes made with oil are extra moist and spongey. Use a flavorless oil, like canola oil or vegetable oil. I don't recommend olive oil or coconut oil because they might impact the taste.
- Egg- An egg binds the ingredients together and helps the cake rise. Take it out of the refrigerator an hour before you start baking to reach room temperature.
- Buttermilk- Buttermilk tenderizes the gluten, creating a super soft cake. Take it out of the refrigerator with the egg to reach room temperature.
- Vanilla extract- Vanilla enhances the overall flavor of the chocolate cake and frosting.
- Brewed coffee- Hot coffee is used to "bloom" (or activate) the cocoa powder, which intensifies the flavor and makes the cake even more chocolatey. You won't be able to taste the coffee at all.
- Cream cheese- Use softened, full-fat cream cheese to make super creamy frosting. Use a block of cream cheese, not a tub. Cream cheese from a tub will be too runny, especially since this is cream cheese frosting without butter.
- Powdered sugar- Powdered sugar (AKA icing or confectioners sugar) thickens and sweetens the frosting. You don't have to sift it.
Substitutions
- All purpose flour: Try using Bob's Red Mill 1-to-1 Baking Flour to make the chocolate cake gluten free.
- Buttermilk: You can substitute plain kefir, plain Greek yogurt, or sour cream for the buttermilk at a 1:1 ratio. You can make your own buttermilk by combining 1 cup (245g) of whole milk with 1 tablespoon of lemon juice or vinegar. Let it curdle for 10 minutes and it's ready to use.
- Brewed coffee: If you don't have coffee, use boiling hot water. The chocolate flavor won't be as deep, but the cake will still taste amazing!
Note that this recipe hasn't been tested with any substitutions or variations. If you try one of them, let me know how it goes in the comments!
Helpful Equipment and Tools
- 6-inch round cake pans: Use aluminum pans, not glass or silicone. Glass pans don't heat up evenly and your cake will burn in a silicone pan. I recommend non-stick pans, but if yours aren't, spray them with baking spray before lining with parchment rounds.
- 5-quart stand mixer: While no mixer is required for the cake, you'll need one for the frosting. Fit it with the paddle attachment. You can also use an electric hand mixer with a large bowl, but the instructions below are specifically for a stand mixer.
- For decorating, I recommend an offset spatula to spread the frosting evenly. A bench scraper is optional but helpful for smoothing everything out.
- To take your cake decorating to the next level, use a revolving cake decorating stand with a non-slip pad. This holds the cake in place and makes it so you don't have to awkwardly reach around it.
Step by Step Instructions - Chocolate CAKE
Before you start, preheat the oven to 350°F/180°C, brew your coffee, and line two 6-inch cake pans with parchment paper.
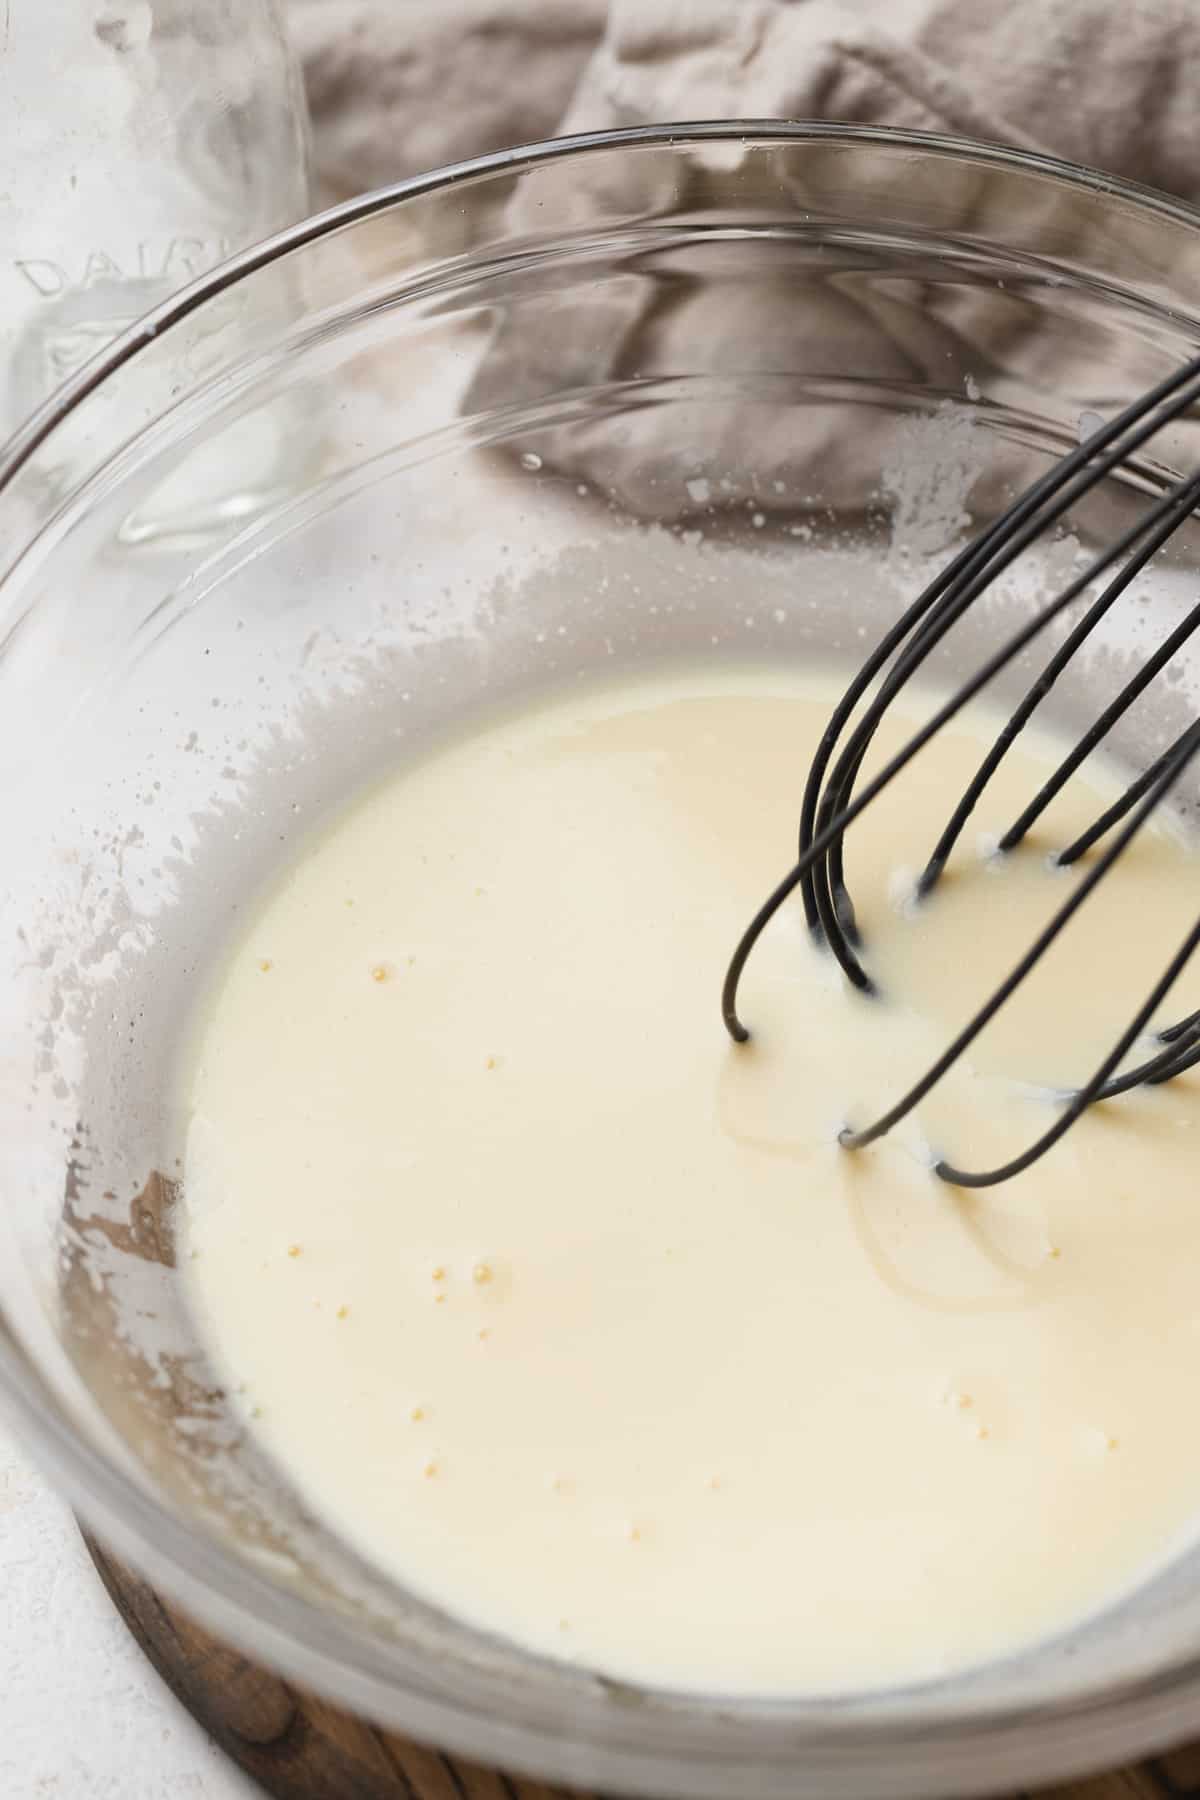
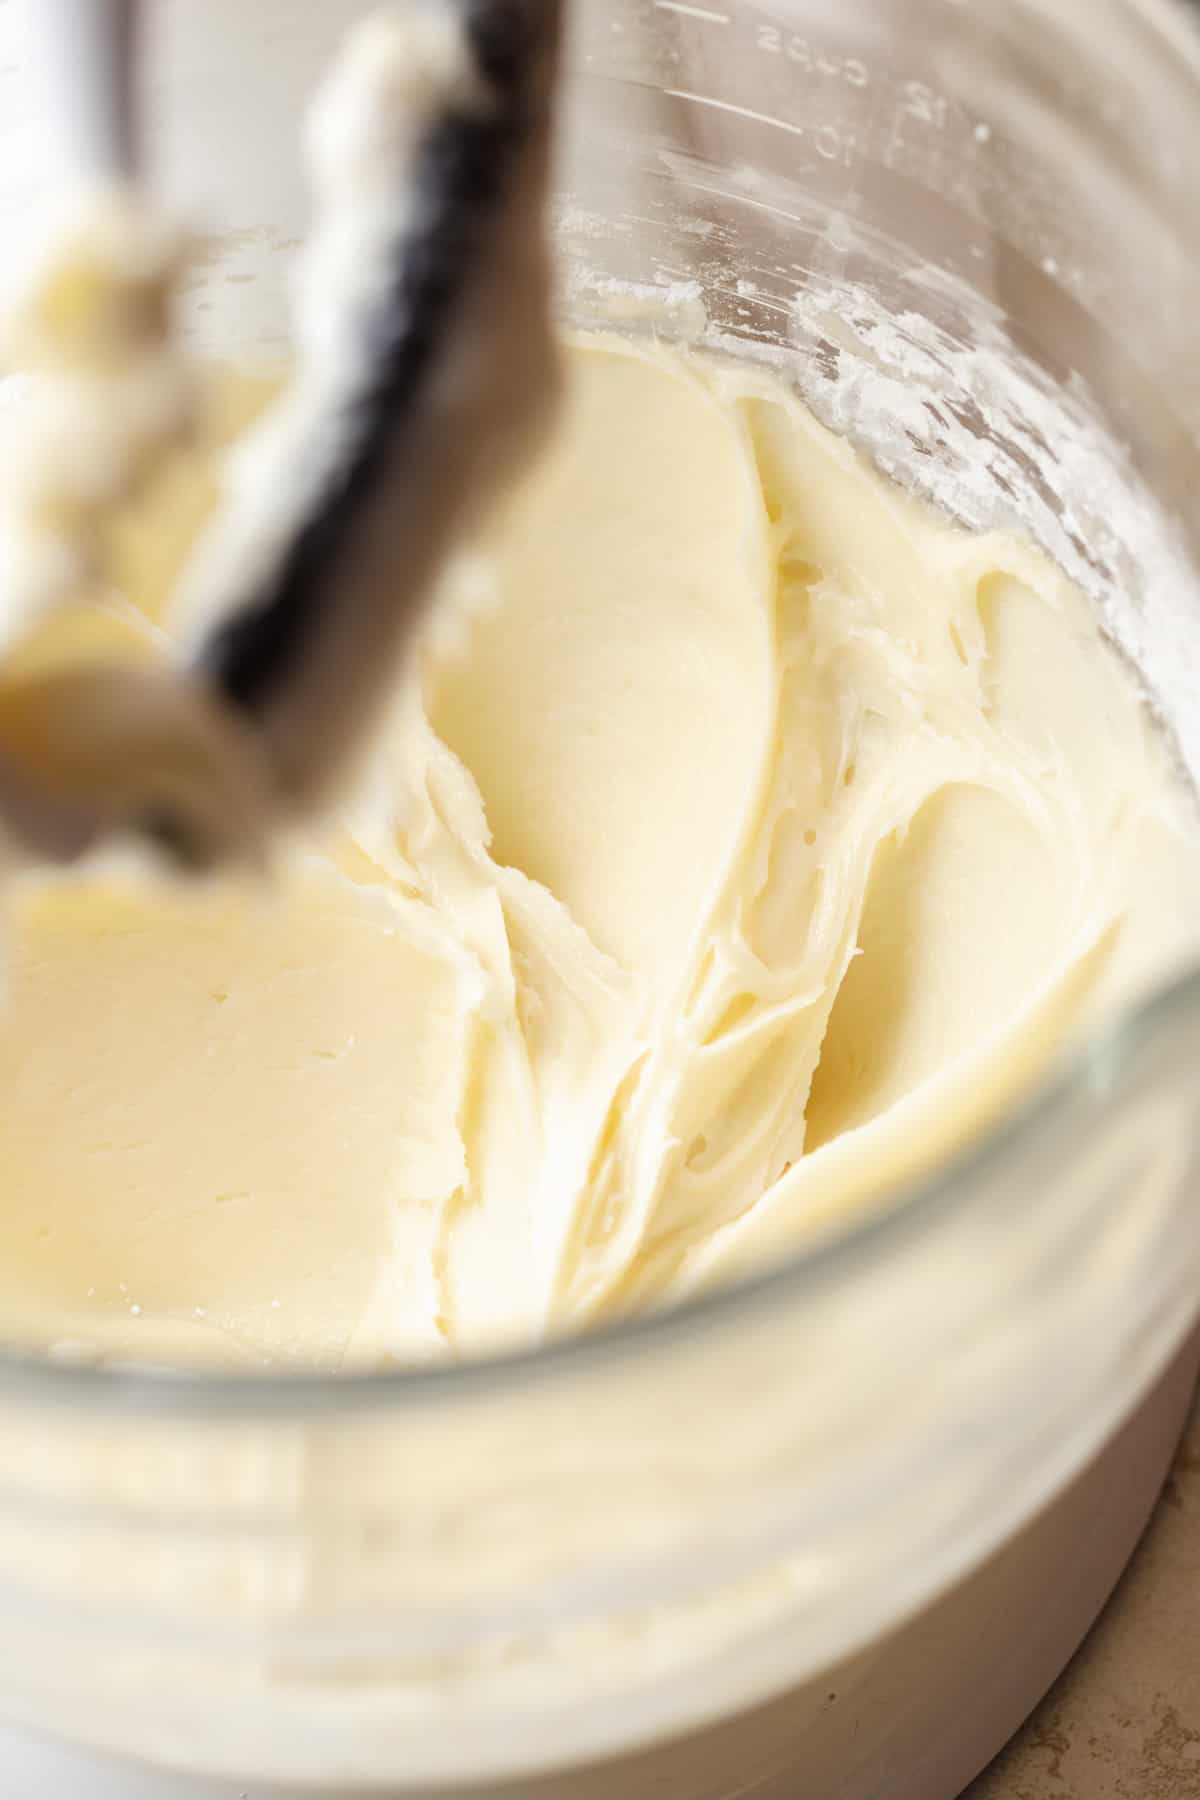
STEP 1: First, whisk the oil, egg, buttermilk, and vanilla together in a large bowl. Make sure everything is mixed well.
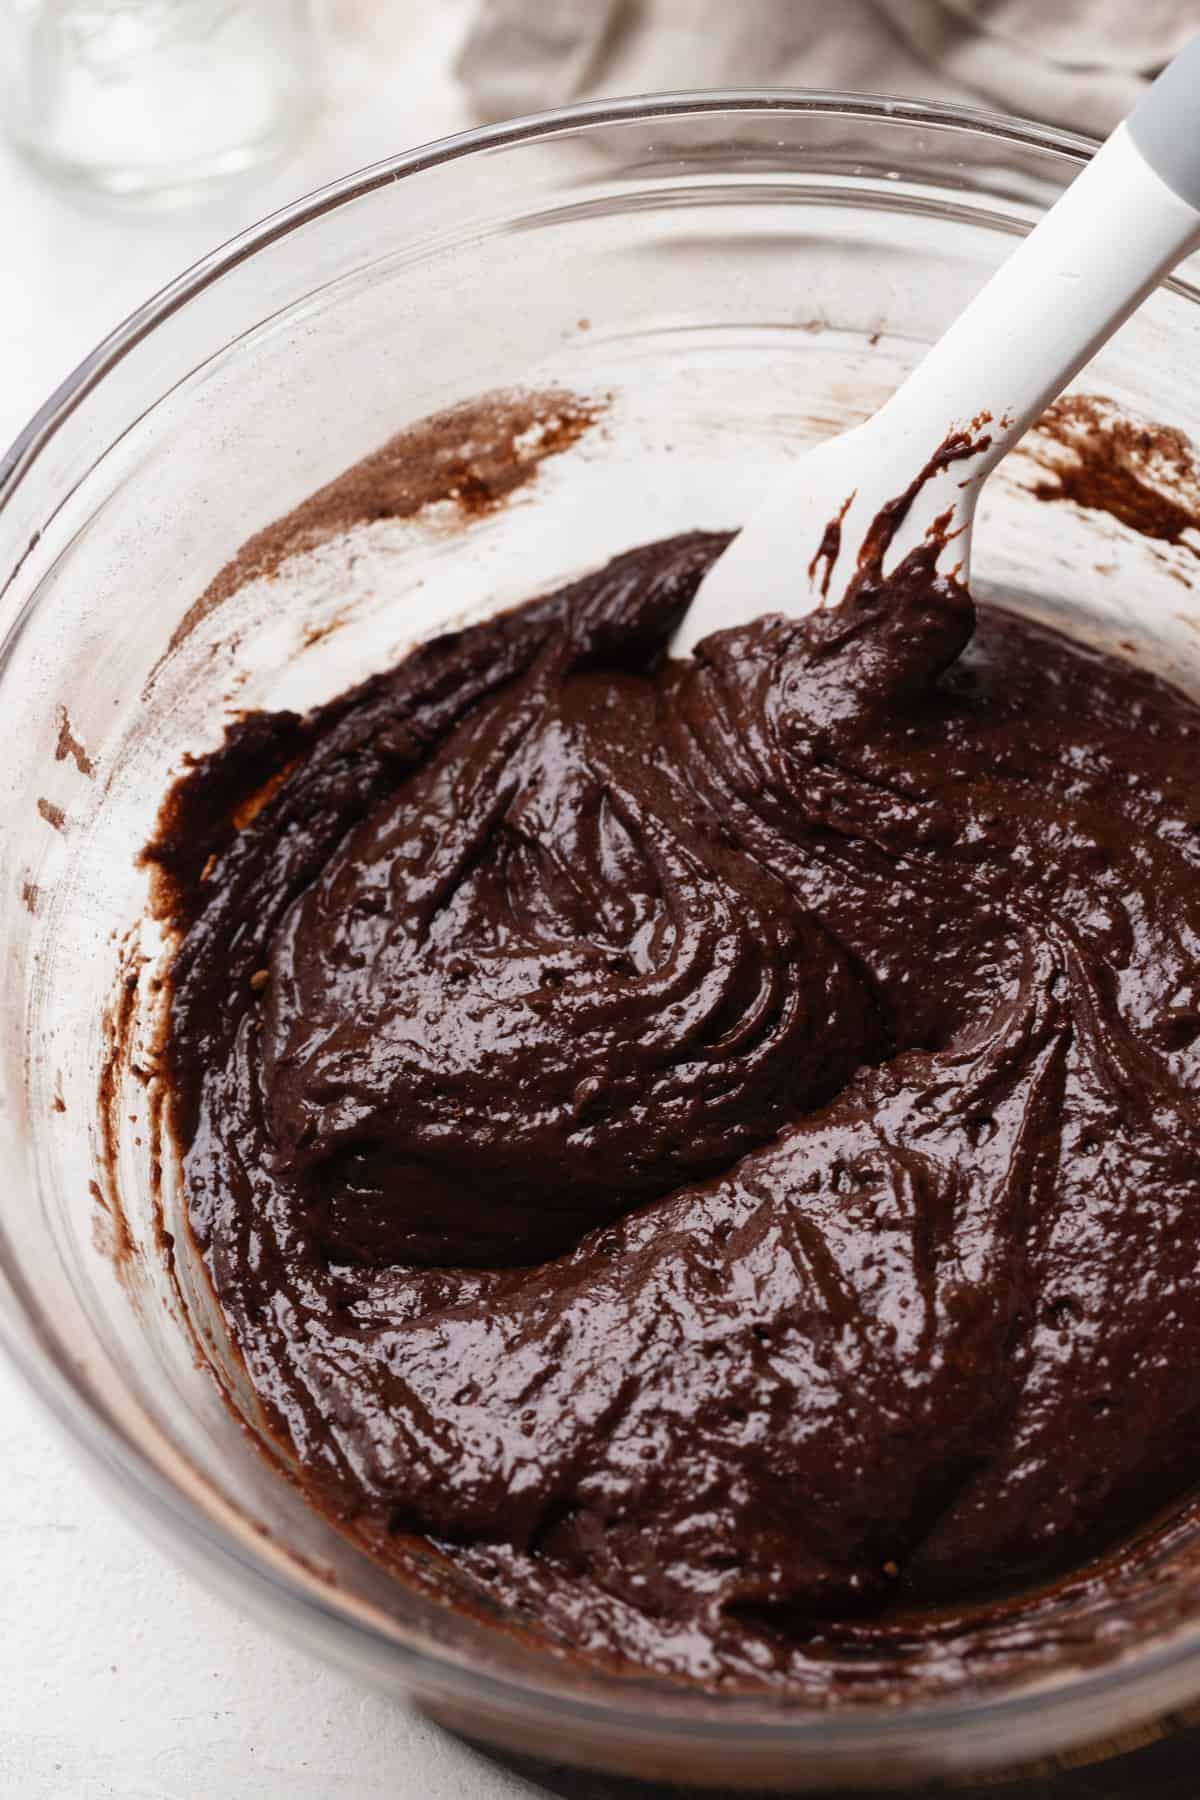
STEP 2: Pour the flour, sugar, cocoa powder, baking powder, baking soda, and salt into the bowl of wet ingredients. Fold everything together until there are no lumps.

STEP 3: Next, pour in the hot coffee half at a time, folding in until totally smooth. The batter will be very liquidy!
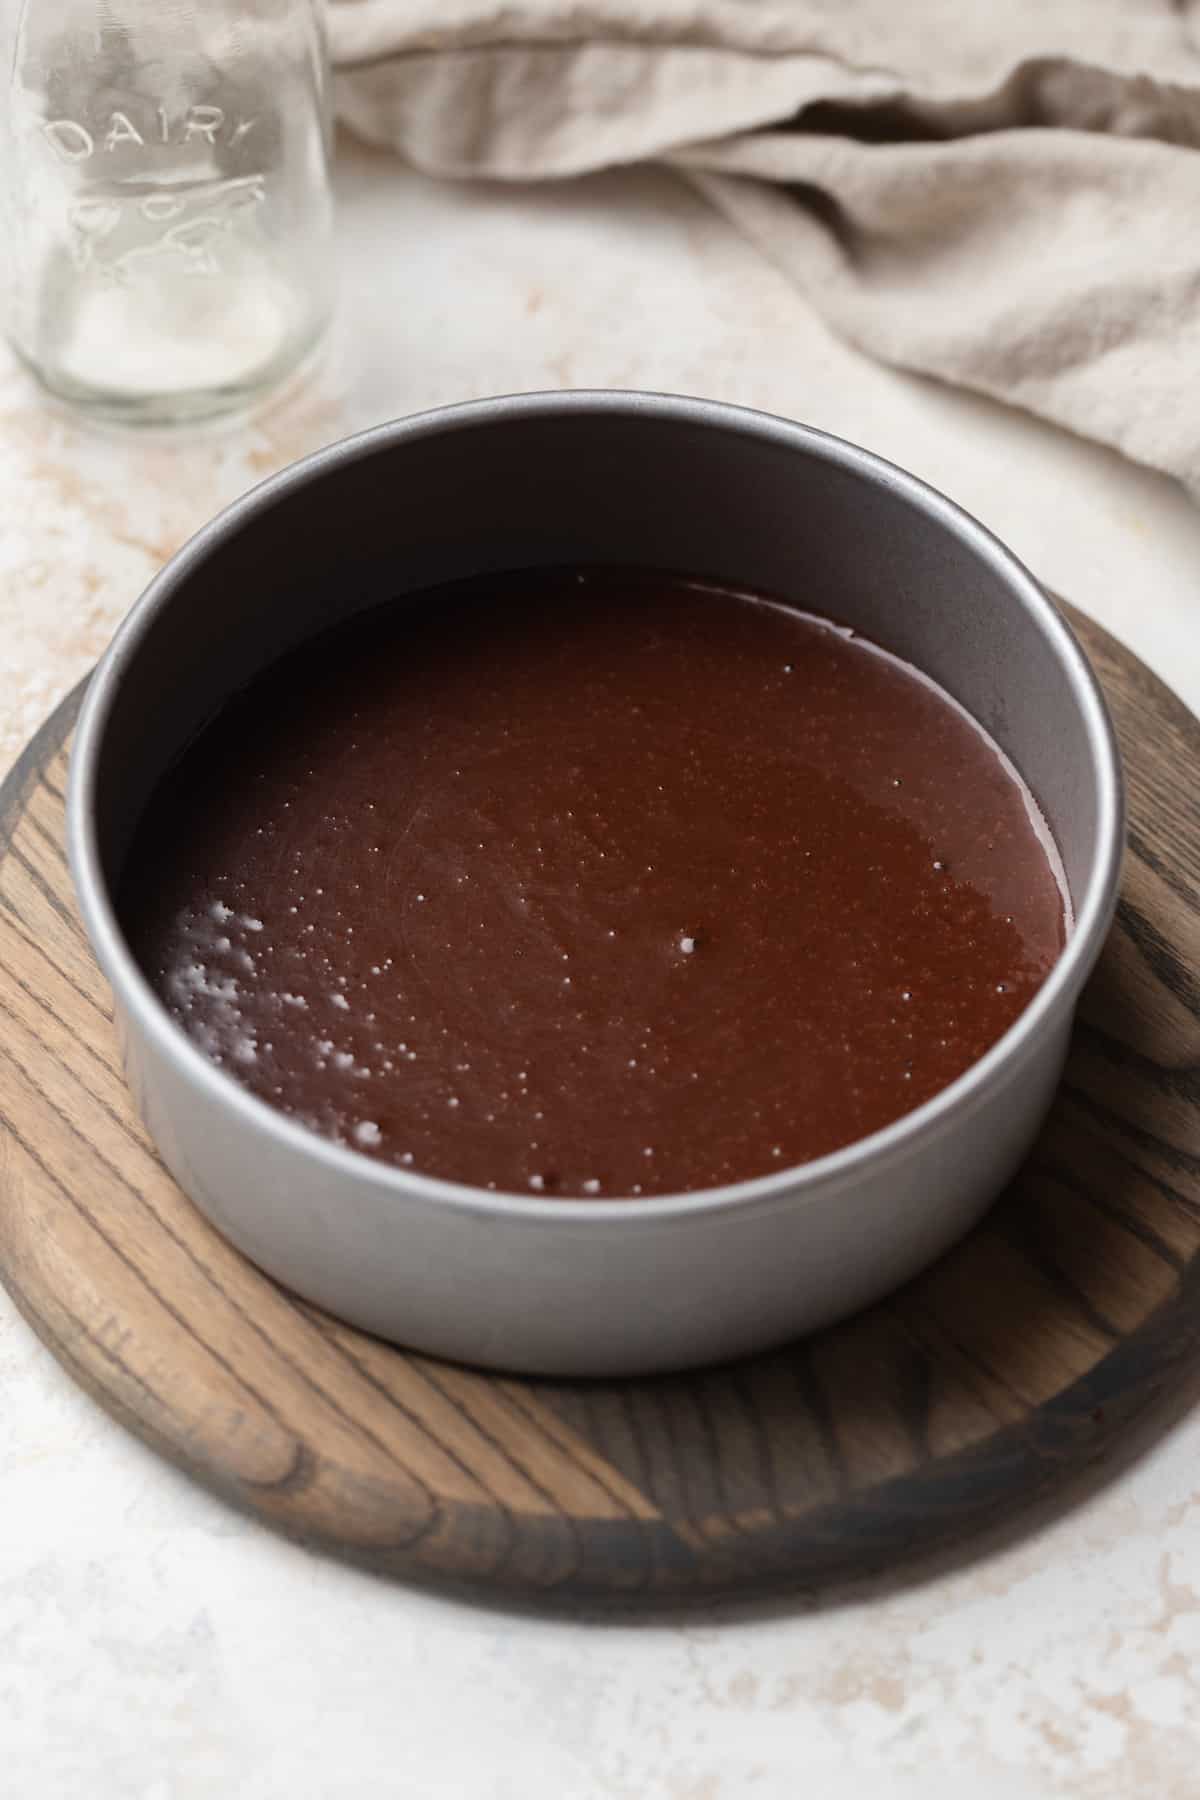
STEP 4: Pour the batter into your two 6-inch greased and lined cake pans and bake at 350 degrees Fahrenheit/180 degrees Celsius for 25-30 minutes.

STEP 5: Let the cakes cool in their pans for about 10 minutes before removing and transferring to a wire rack to cool completely (about 30 minutes). While they cool, make the cream cheese frosting.
Step by Step Instructions - Cream Cheese Frosting
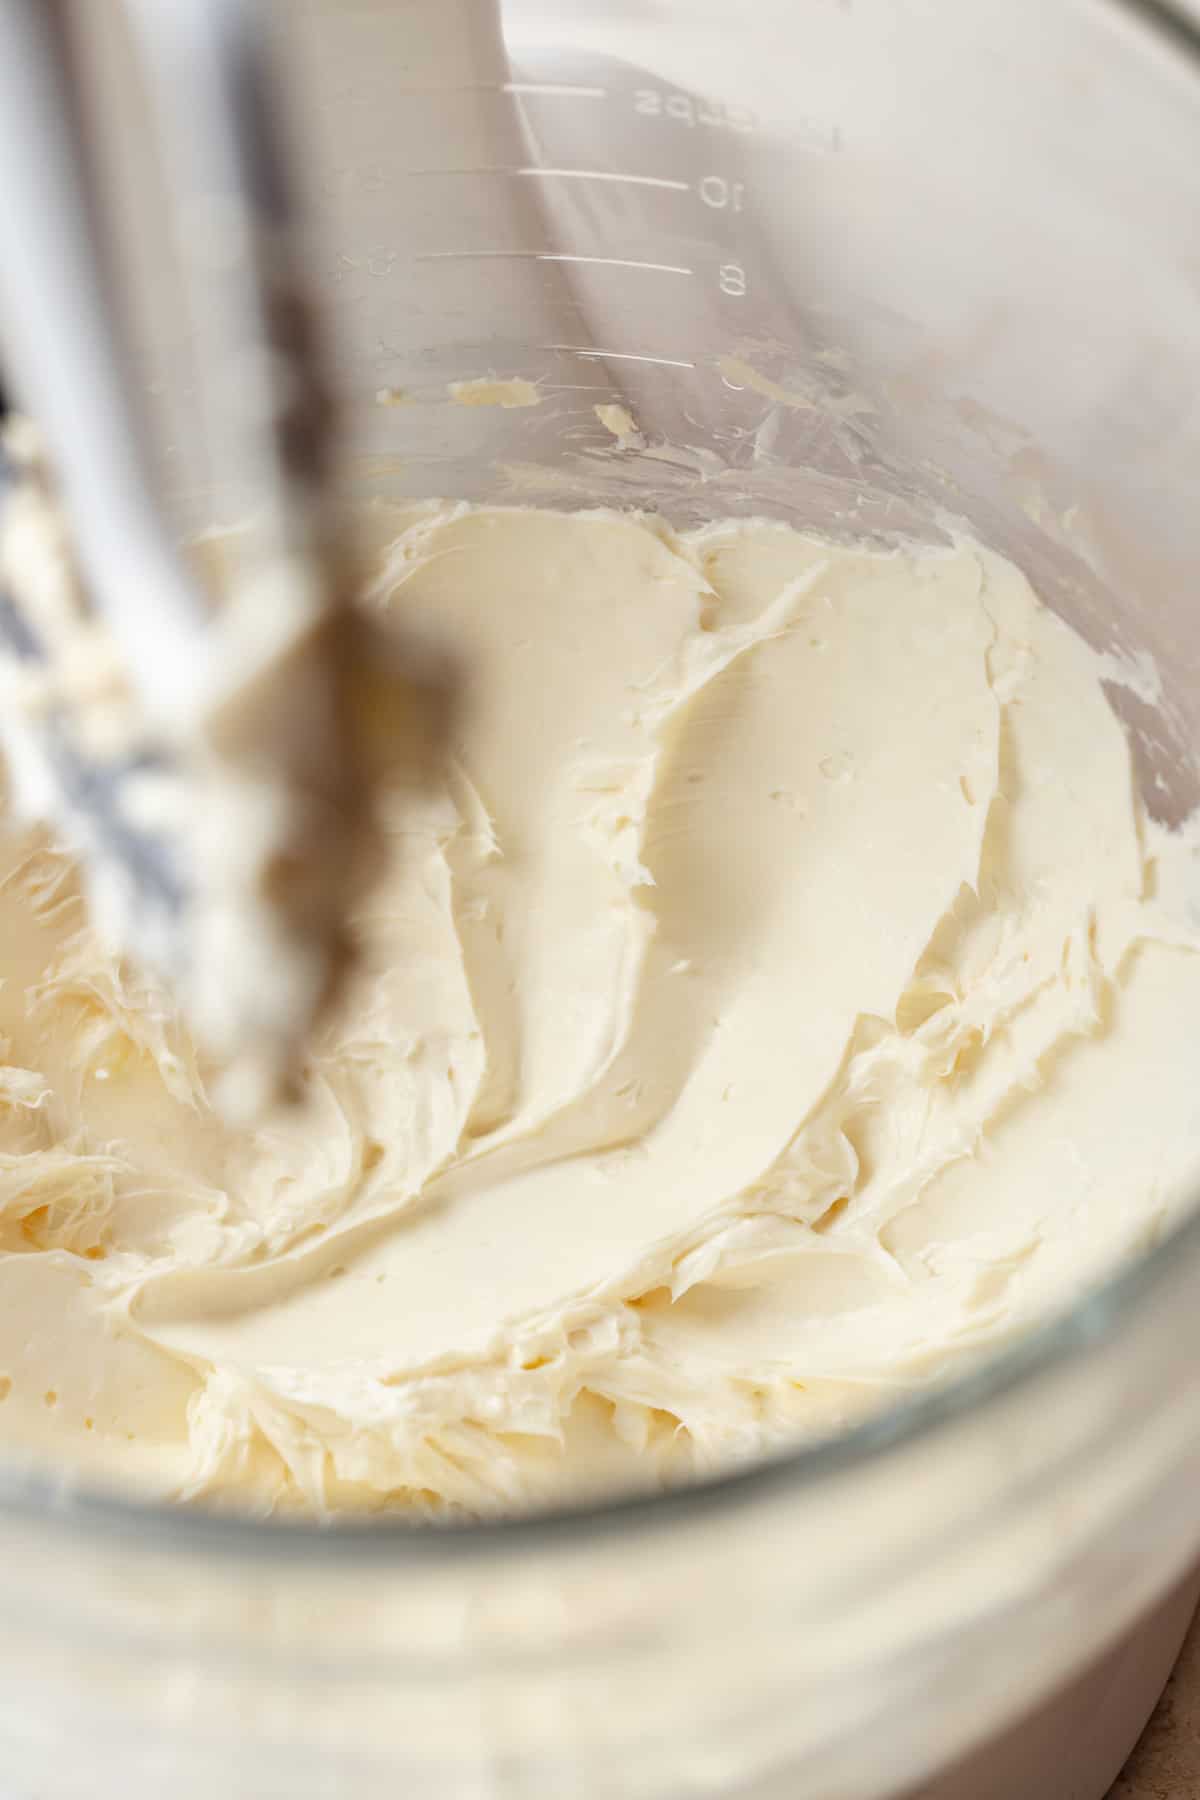
STEP 1: First, add the room temperature cream cheese, vanilla, and salt to the bowl of a stand mixer fitted with a flat beater. Beat on medium speed for 2-3 minutes until the mixture is light and fluffy.
STEP 2: Next, add in the powdered sugar 1 cup at a time with the mixer on low speed. Scrape down the sides of the bowl as needed to make sure everything is well combined. Keep mixing on medium until the frosting the is light and creamy.
Once the frosting is done, it's time to assemble the cake!
Step by Step Instructions - Assembly
First, check to see if the cake layers are even. If the tops aren't flat, level them with a serrated knife. This makes frosting easier and prevents air bubbles from forming between the layers.
Add a tablespoon of frosting to the middle of your cake stand and fan it out to keep the cake from moving. Next, place the first cake layer in the middle of the cake stand. Dollop ¾ cup frosting on top and use an offset spatula to spread an even layer.
Place the second cake layer upside down on top and repeat the process, but spread the frosting down the sides and around the entire cake. This is the "crumb coat", which locks in loose crumbs to keep them from mixing into the final layer of frosting. Once the crumb coat is applied, you can leave it as is or add a final coat after chilling in the freezer for 10 minutes.
Once the crumb coat has firmed up, spread a second layer of frosting all over the cake. Run a bench scraper around the sides and edges to smooth it out if desired. I used my offset spatula to make big swirls on top of the cake, but you can also add sprinkles, chocolate shavings, or use any decorating technique you like. Slice and enjoy!

Expert Baking Tips
- Use a kitchen scale. I recommend a digital scale for the best results! If you don't have one, always spoon-measure your flour. Fluff the flour up in the bag before spooning it into your measuring cup and swiping off the excess.
- Use room temperature ingredients. Using room temperature eggs, buttermilk, and cream cheese is important for preventing lumps and making sure everything bakes up evenly.
- Don't overmix the batter. Overmixing the batter will result in a dense cakes with sunken centers.
- Wait until the cakes cool to frost. Wait for the cakes to cool completely before frosting. The frosting will melt off if they're still warm!
Additions & Variations
- Chocolate cream cheese frosting- Mix ½ cup of cocoa powder into the frosting while beating in the powdered sugar.
- Mocha- Frost the cake with coffee cream cheese frosting to make it mocha flavored.
- Chocolate ganache- Spread chocolate ganache in between the cake layers instead of frosting. You can use the recipe from my chocolate ganache cake or this whipped chocolate ganache frosting.
- Chocolate chips: Fold a cup of chocolate chips into the batter before baking. You can also sprinkle some on top as a garnish.
- Chopped nuts: Chop up some almonds, pecans, hazelnuts, or walnuts and fold them into the batter. They can be used as a garnish too!
Storage & Freezing
The chocolate cake with cream cheese frosting stays fresh in the fridge for up to 5 days since the frosting seals in moisture. To keep it fresh, store it unsliced in a cake carrier or other large airtight container. If you've already sliced into it, cover the cut section with extra frosting so it doesn't dry out.
Freezing
Tightly wrap individual slices in cling film and freeze in an airtight container for up to 3 months. When you're ready for a slice, simply unwrap one and let it sit on a plate at room temperature and thaw for an hour.
I don't recommend freezing the whole, unsliced cake. However, you can freeze the cake layers before frosting them. This breaks up the baking and decorating processes and makes things more manageable. Plus, frosting frozen cakes is easier because there are less loose crumbs!

Frequently Asked Questions
Yes! This recipe will make 1 9-inch cake layer. You can also use a 9x9" pan. Double the recipe to make 2 8-round cake layers.
The cake is done when the center is no longer jiggly and it bounces back when lightly pressed. You can also test for doneness by inserting a toothpick in the center. If it comes out mostly clean with a few moist crumbs, the cake is done!
You sure can! You can make the cake layers up to 5 days ahead of time if you store them in the refrigerator and up to 3 months ahead of time if you freeze them. I recommend making the frosting and decorating the cake the same day you plan to serve it just because cream cheese frosting can dry out over time.
Sure! If you prefer a more sturdy cream cheese frosting made with butter, make a double batch of this small batch cream cheese frosting. For frostings without cream cheese, try whipped chocolate buttercream, banana buttercream, or Swiss meringue buttercream.
More Cake Recipes to Try


📖 Recipe

Chocolate Cake with Cream Cheese Frosting
Equipment
- 1 5-quart stand mixer or electric mixer
- 1 cake stand
- 1 offset spatula
Need Metric or US Customary Measurements?
Use the buttons below to toggle between grams and cups!
Ingredients
Chocolate Cake
- 97 grams neutral oil
- 1 large egg room temperature
- 168 grams buttermilk room temperature
- 1 teaspoon vanilla extract
- 120 grams all purpose flour
- 225 grams granulated sugar
- 56 grams cocoa powder Dutch-processed or natural
- ½ teaspoon baking powder
- ½ teaspoon baking soda
- ½ teaspoon salt
- 140 grams hot brewed coffee
Cream Cheese Frosting
- 226 grams full-fat cream cheese room temperature
- 1 teaspoon vanilla extract
- ½ teaspoon salt
- 360 grams powdered sugar
Instructions
Chocolate Cake
- Preheat oven to 350°F or 180°C. Line 2 6-inch round cake pans with parchment paper and set aside
- In a large mixing bowl, whisk together oil, egg, buttermilk, and vanilla extract.97 grams neutral oil, 1 large egg, 168 grams buttermilk, 1 teaspoon vanilla extract
- Pour flour, sugar, cocoa powder, baking powder, baking soda, and salt into the wet ingredients. Fold with a rubber spatula until smooth with no lumps.120 grams all purpose flour, 225 grams granulated sugar, 56 grams cocoa powder, ½ teaspoon baking powder, ½ teaspoon baking soda, ½ teaspoon salt
- Pour in ½ of hot coffee and fold with a rubber spatula until smooth. Pour in the second half and repeat. The batter will be thin.140 grams hot brewed coffee
- Add batter evenly to the prepared cake pans and bake in your preheated oven for 25-30 minutes or until a toothpick inserted in the center comes out clean.
- Remove from the oven and let the cakes cool in their pans before removing and transferring to a wire rack to cool completely.
Cream Cheese Frosting
- Add softened cream cheese, vanilla, and salt to the bowl of a stand mixer. Beat on medium speed for 2-3 minutes until fluffy and creamy.226 grams full-fat cream cheese, 1 teaspoon vanilla extract, ½ teaspoon salt
- With the mixer on low, gradually add the powdered sugar 1 cup at a time until well combined. Mix on medium speed for 2 minutes.360 grams powdered sugar
Assembly
- Place one chocolate cake layer on a cake stand and spread ¾ cup frosting evenly across the top.
- Flip the second layer upside down and place it on top of the first layer. Carefully spread a thin coat of frosting around the whole cake with an offset spatula.
- Chill the cake in the freezer for 20 minutes.
- Once the crumb coat is firm, spread a final layer of frosting around the entire cake. Slice and enjoy!


Comments
No Comments