
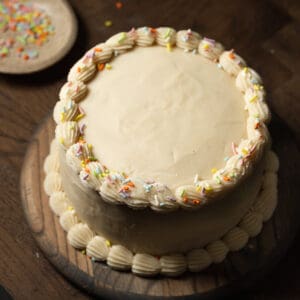
This 6-inch small vanilla cake recipe is mini but mighty! It's made with two round cake layers that are tender, moist, and full of vanilla flavor. Frosted with sweet cream cheese frosting, it's a perfect cake for any small celebration!
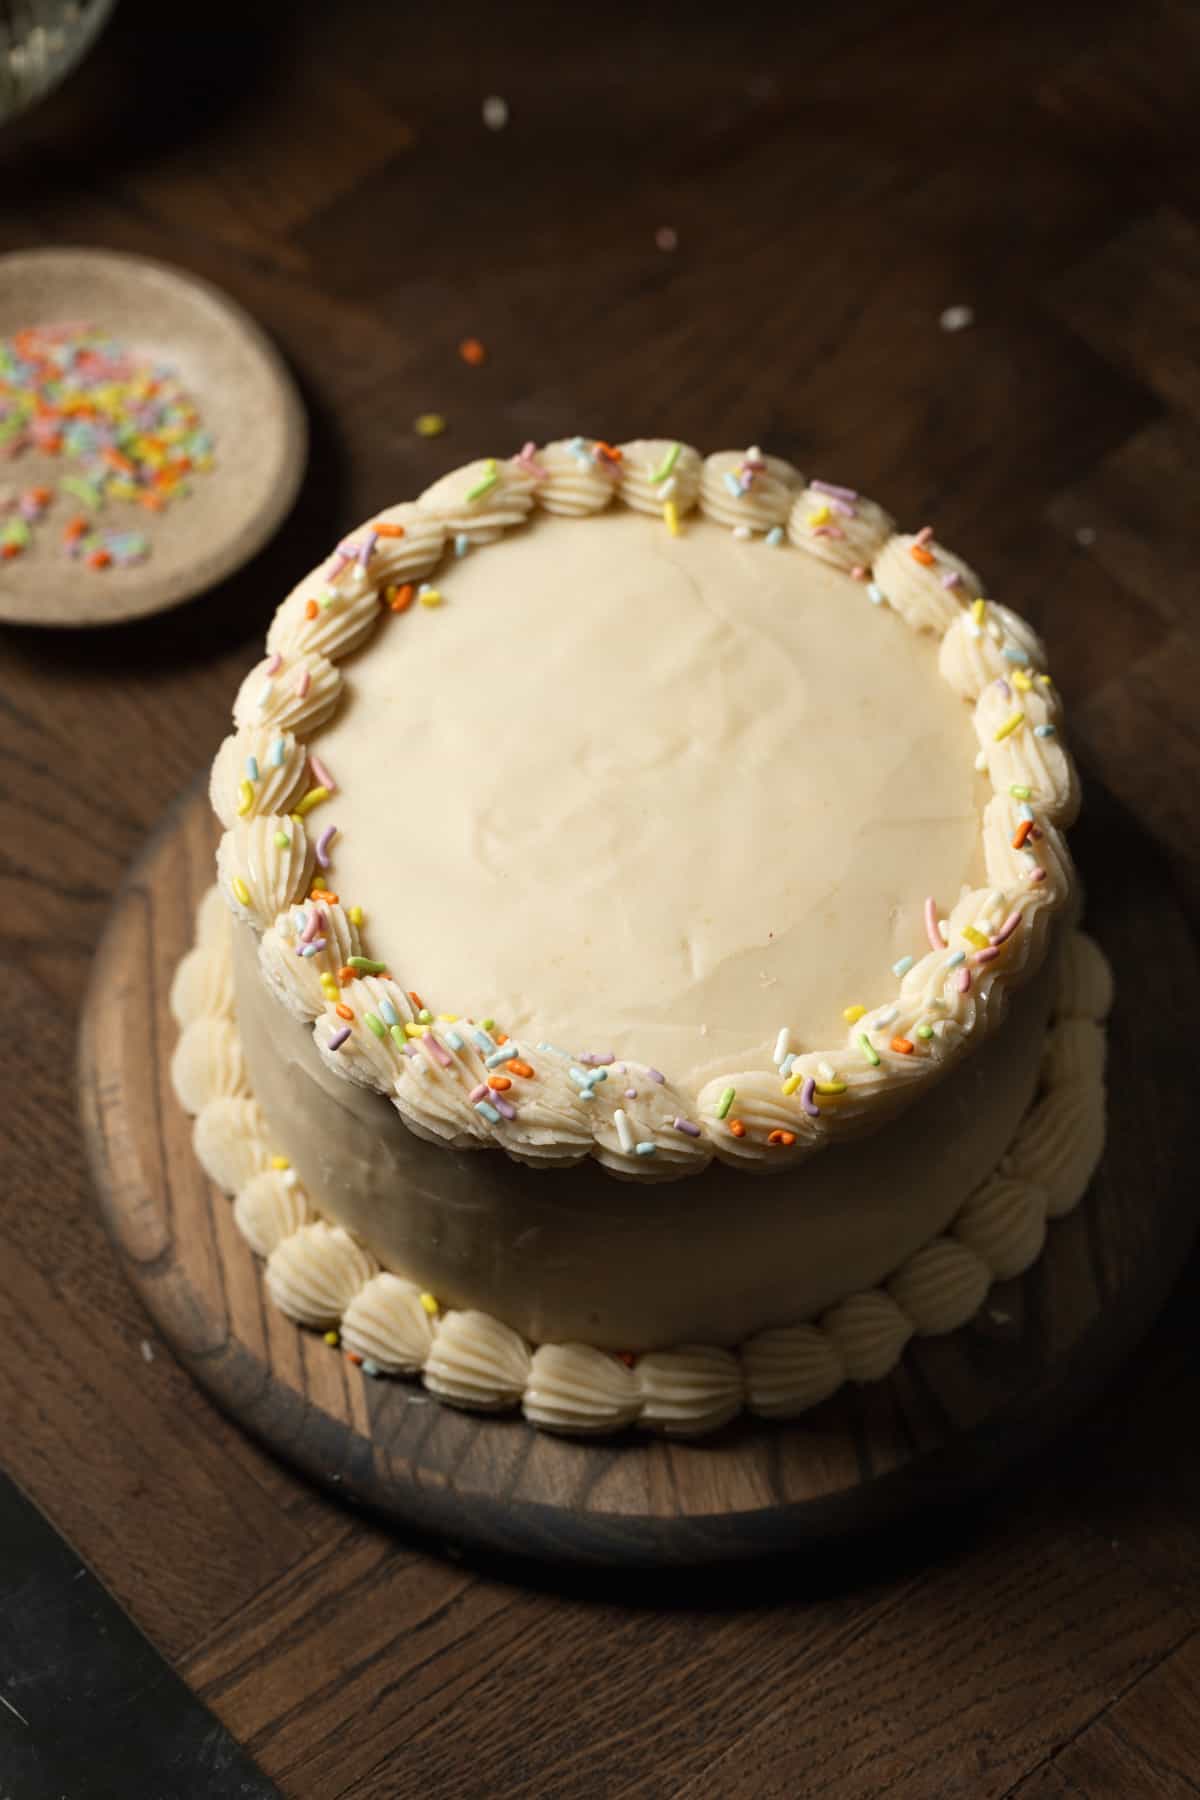
This small vanilla cake is the best simple cake! It may be a little 6-inch cake, but it doesn't lack in flavor and texture. It is soft, fluffy, and has a delicious, sweet vanilla flavor. It's filled and frosted with luscious cream cheese frosting.
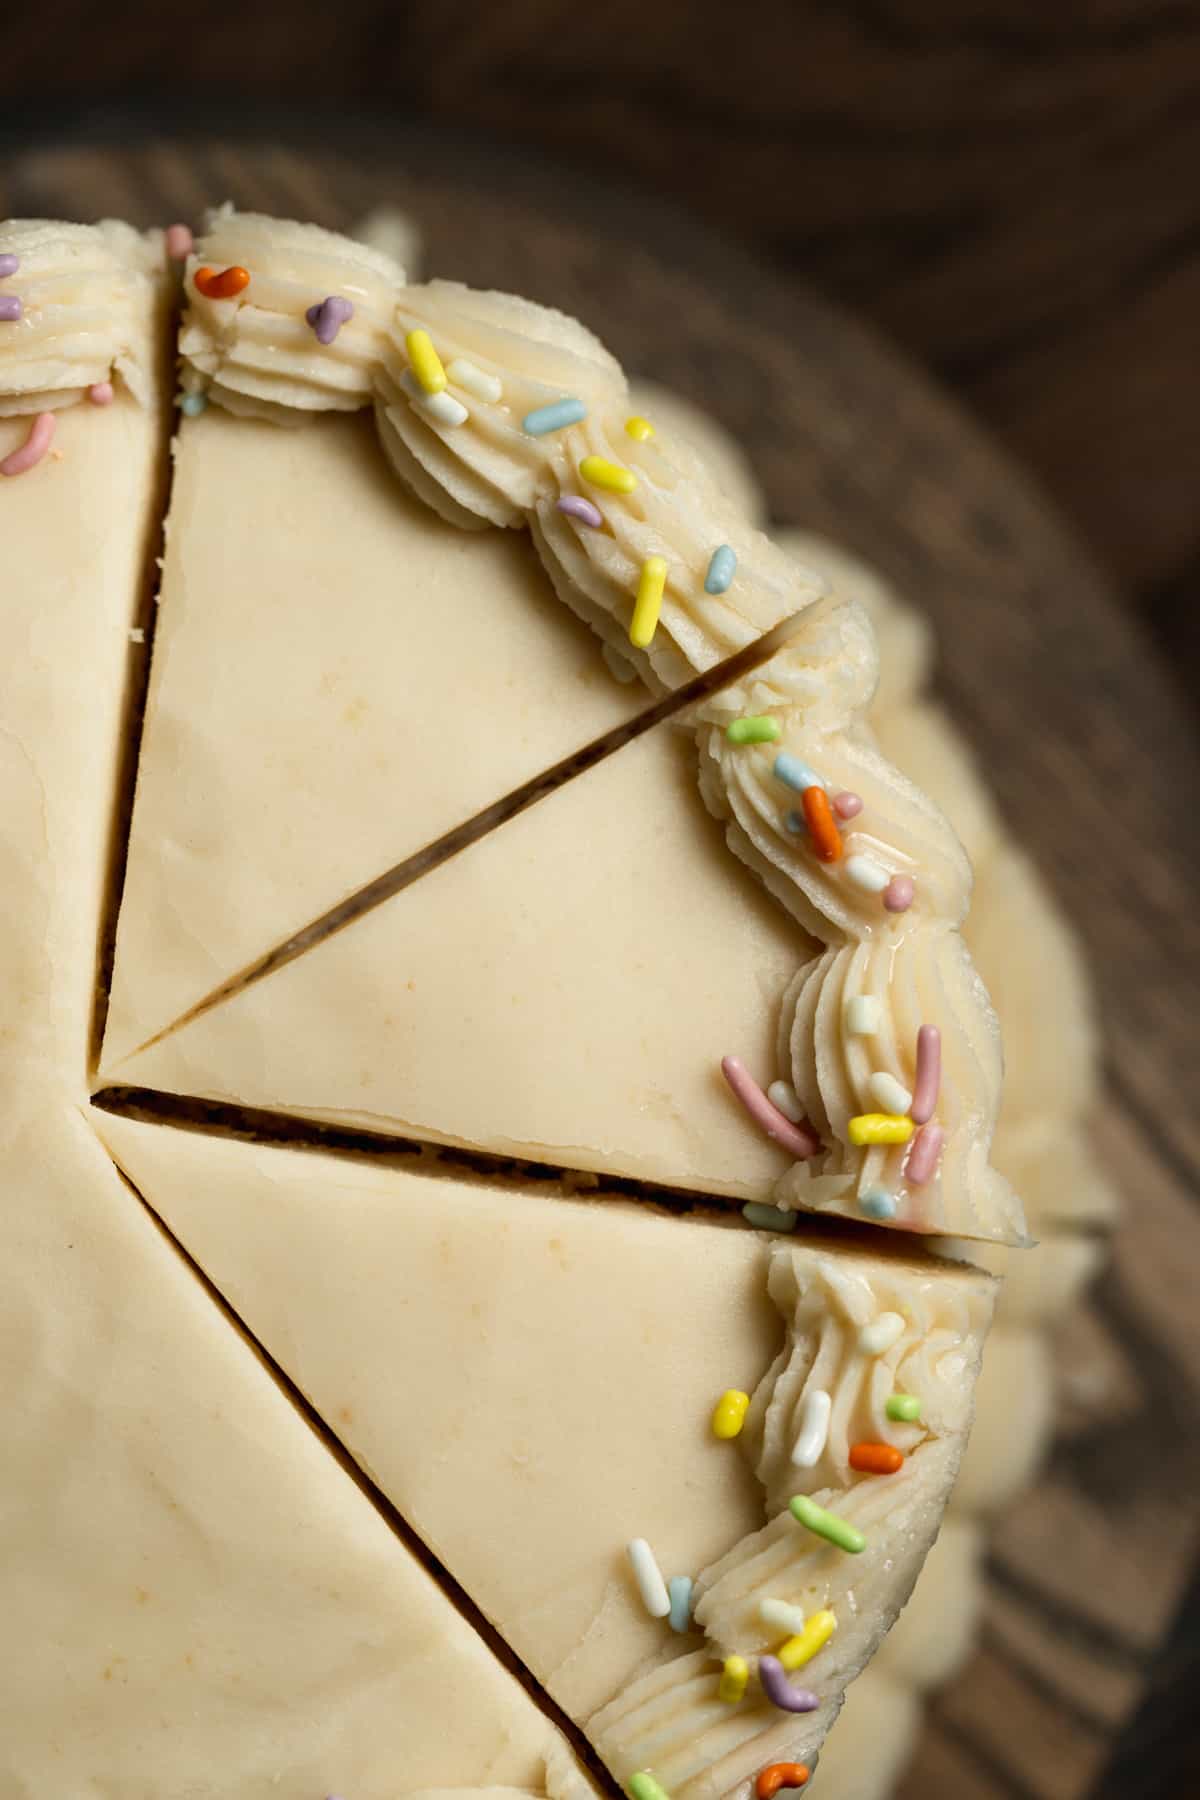
Topped with rainbow sprinkles, this makes a great mini birthday cake! Even if you don't have a birthday coming up, you can serve it at anniversaries, bridal showers, and other small celebrations.
If you want more small batch recipes, make mini flourless chocolate cake, mini carrot cake, small batch brownies, small batch blueberry muffins, small batch red velvet cupcakes, or small batch vanilla cupcakes.
Jump to:
Why You'll Love This Recipe
- Tender and moist cake- The cake is soft because it is made cake flour and buttermilk, but it stays moist because of the oil. Mixing butter into the dry ingredients (reverse creaming method) instead of the wet ingredients makes the crumb extra tender. I use this method in lots of cake recipes, including this strawberry vanilla cake, lemon berry mascarpone cake, and almond cream cake.
- Rich vanilla flavor- There is vanilla extract in the cake batter and vanilla bean paste in the cream cheese frosting, making this the best vanilla cake! Never too much vanilla in my book.
- The perfect size- This is a 6 inch vanilla cake recipe, which is smaller than your average cake. It's perfect to make for a small birthday party or even date night if you don't mind leftovers.
Ingredient Notes
Here are some notes about the key ingredients used. For quantities and full instructions, see the recipe card below.

- Cake flour- This light and fluffy flour has less protein and gluten than all purpose flour, giving the cake a tight, soft, tender crumb! Cake flour is essential for the texture, so you can't use all purpose flour. Make sure to measure it in grams with a kitchen scale for the best results. If you use too much flour, the cake will be dry and dense.
- Granulated sugar- White sugar adds the perfect amount of sweetness and lets the vanilla flavor shine. Cane sugar works as a substitute.
- Baking powder- This helps the cake rise by adding air bubbles. Make sure it's less than 6 months old as it loses power over time.
- Baking soda- This leavener interacts with the acid in buttermilk to release gases and make the cake rise. Make sure it's fresh and be careful not to mix up the baking powder and baking soda quantities!
- Salt- Finely ground salt activates the baking powder and contrasts the sweetness. Use Kosher salt or sea salt.
- Unsalted butter- Butter adds a rich flavor and helps cake get light and fluffy. Make sure it's room temperature to mix in easily. Pull it out of the refrigerator 1-2 hours before you start baking.
- Oil- Oil adds more fat, making the cake incredibly moist. Paired with butter, you can't taste it at all! You can use any flavorless oil, like canola or vegetable oil.
- Egg and egg white- A whole large egg binds the ingredients together and adds richness. The egg white adds a little more airiness and lift! Make sure the eggs are at room temperature so they blend into the batter evenly. Pull them out of the refrigerator with the butter.
- Vanilla extract- Use pure vanilla extract for the best flavor, not imitation or artificial vanilla since it's the main flavoring of the cake.
- Buttermilk- This adds additional tang and helps to tenderize the gluten, giving the cake an even softer texture. It's the secret ingredient! Pull it out of the refrigerator with the eggs and butter to reach room temperature.
Substitutions and Variations
- Homemade cake flour substitute- Mix 180 grams all purpose flour with 20 grams cornstarch for a homemade cake flour substitute.
- Unsalted butter- You can use salted butter if it's all you have on hand, just omit the extra salt in the recipe.
- Buttermilk- Plain kefir, plain Greek yogurt, or sour cream can be substituted at a 1:1 ratio. If you don't have buttermilk on hand, you can make your own! Combine ¼ cup whole milk with ¾ teaspoon vinegar or lemon juice. Mix, let it sit for 10 minutes to curdle, and you're good to go.
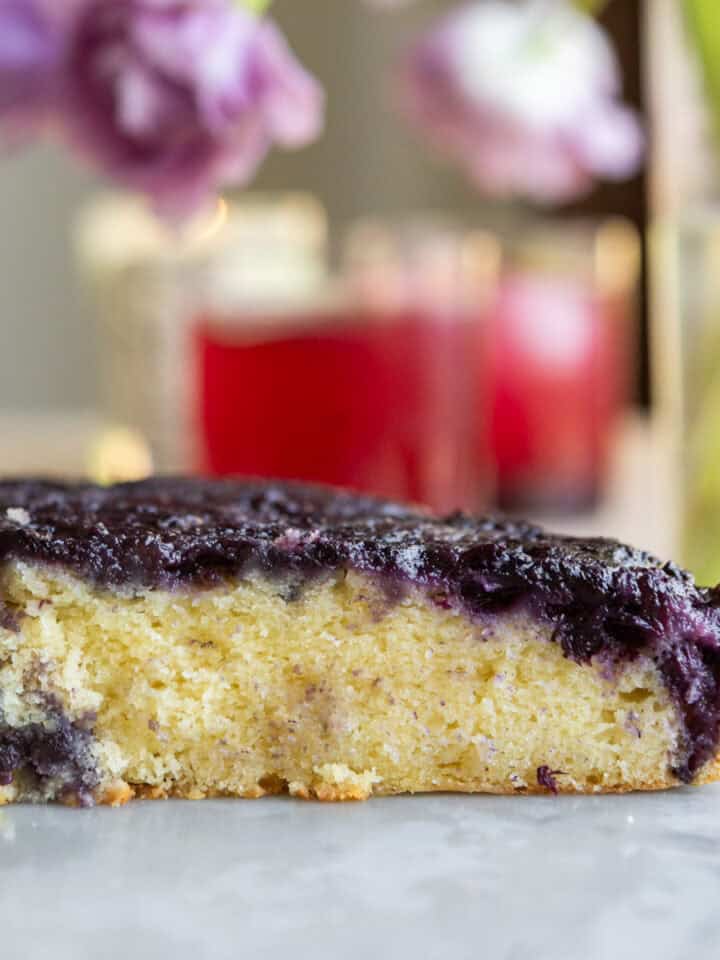
- Add filling- Add a dollop of milk chocolate ganache, lemon curd, strawberry cake filling or raspberry jam, strawberry mousse, or blueberry compote in the center of the cake.
- Different frosting- Use a different kind of frosting, like vanilla buttercream, almond buttercream, chocolate buttercream, blueberry buttercream, or a different kind of cream cheese frosting like white chocolate cream cheese frosting or strawberry cream cheese frosting.
- Garnish ideas- Instead of rainbow sprinkles, top the cake with shaved chocolate, fresh fruit, flowers, or candles for a birthday!
Helpful Equipment and Tools
Use non-stick round 6-inch cake pans. Light-colored metal pans heat the most evenly, so avoid glass and silicone.
For the cake batter, you need a stand mixer fitted with the paddle attachment or an electric hand mixer.
For decorating, use a small offset spatula and icing scraper getting the frosting super smooth.
A cake turntable isn't necessary, but it's worth it if you make a lot of cakes. It spins so the cake is easy to reach around.
Step by Step Instructions
Before you start baking, preheat the oven to 350 degrees Fahrenheit (180 degrees Celsius). Grease or line 2 6-inch round cake pans with parchment paper and set aside.
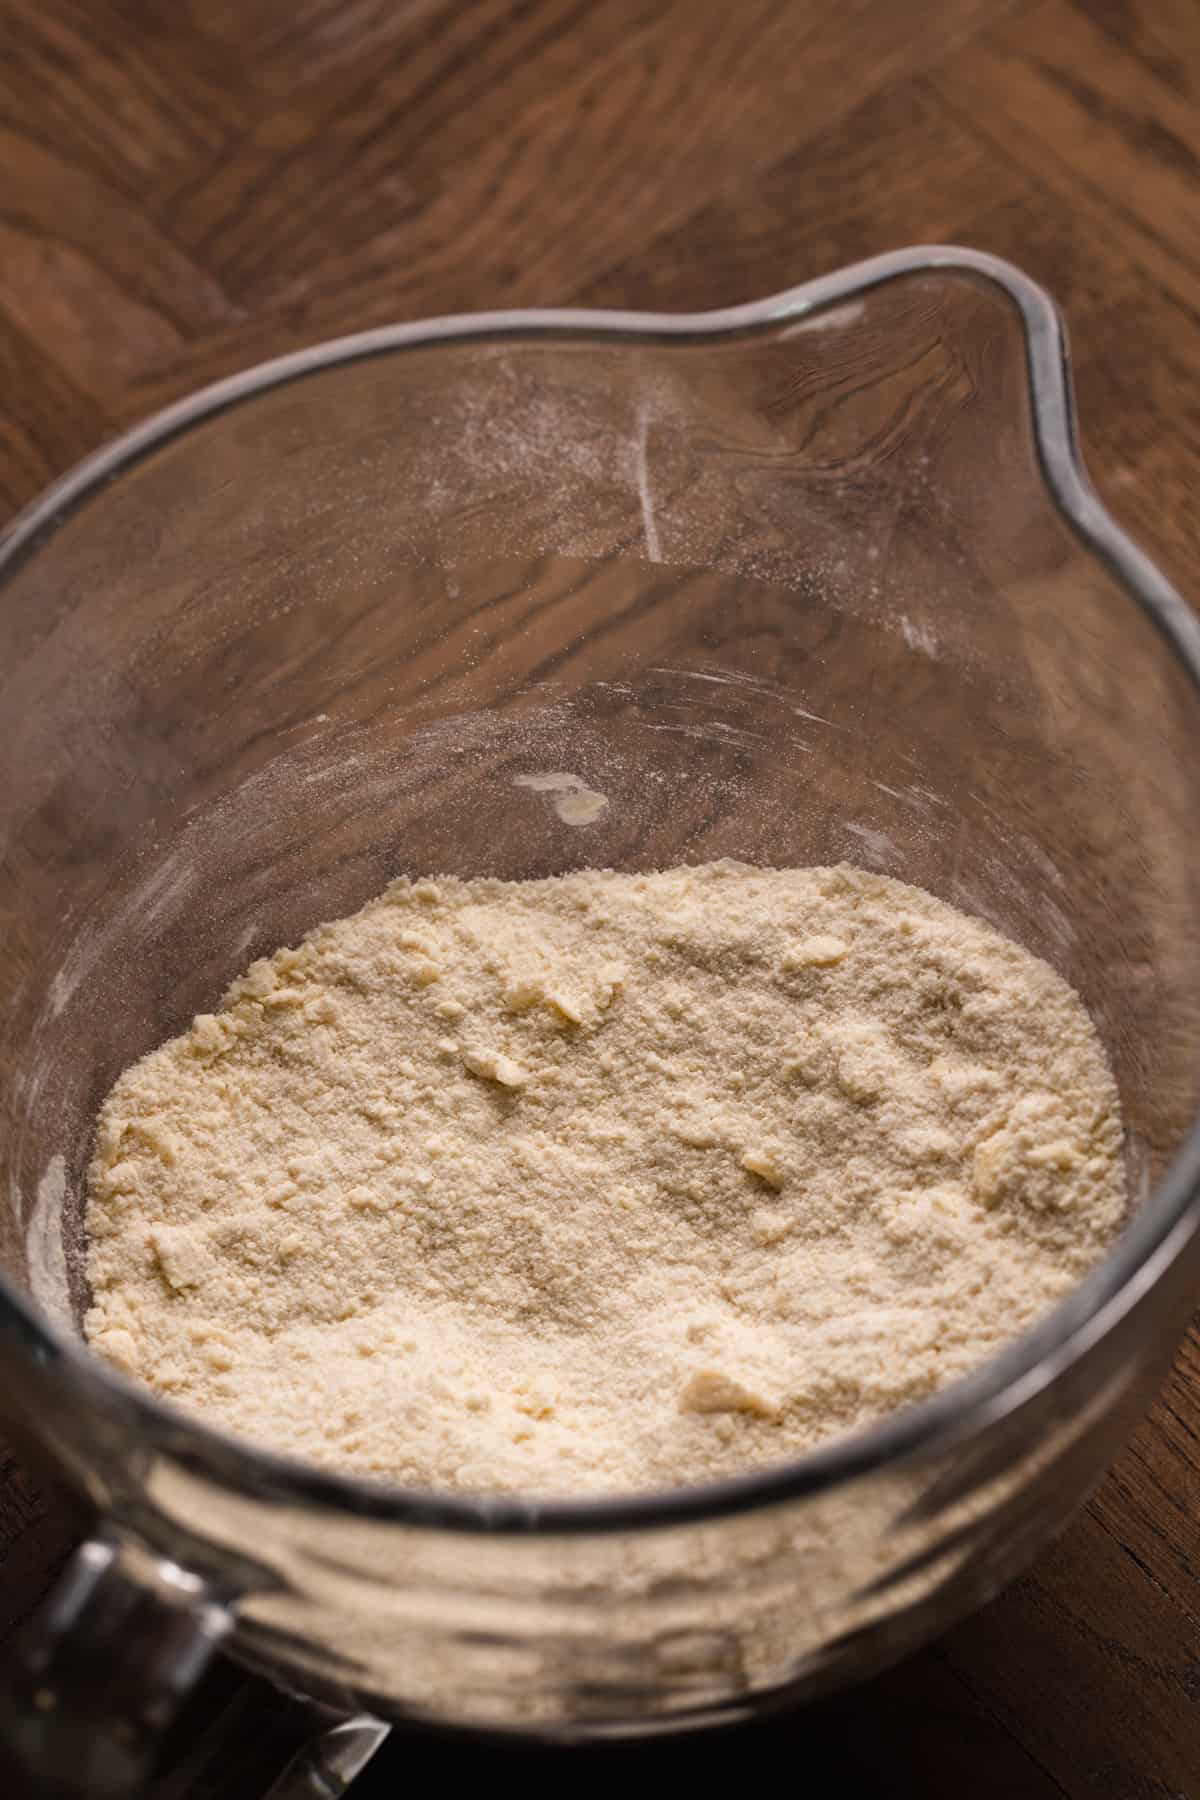
Step 1: First, add the cake flour, sugar, baking powder, baking soda, and salt to the bowl of an electric mixer or stand mixer fitted with the paddle attachment. Mix on low speed until combined.
Then add the softened butter and beat on low for 5 minutes. The texture should look like wet sand.
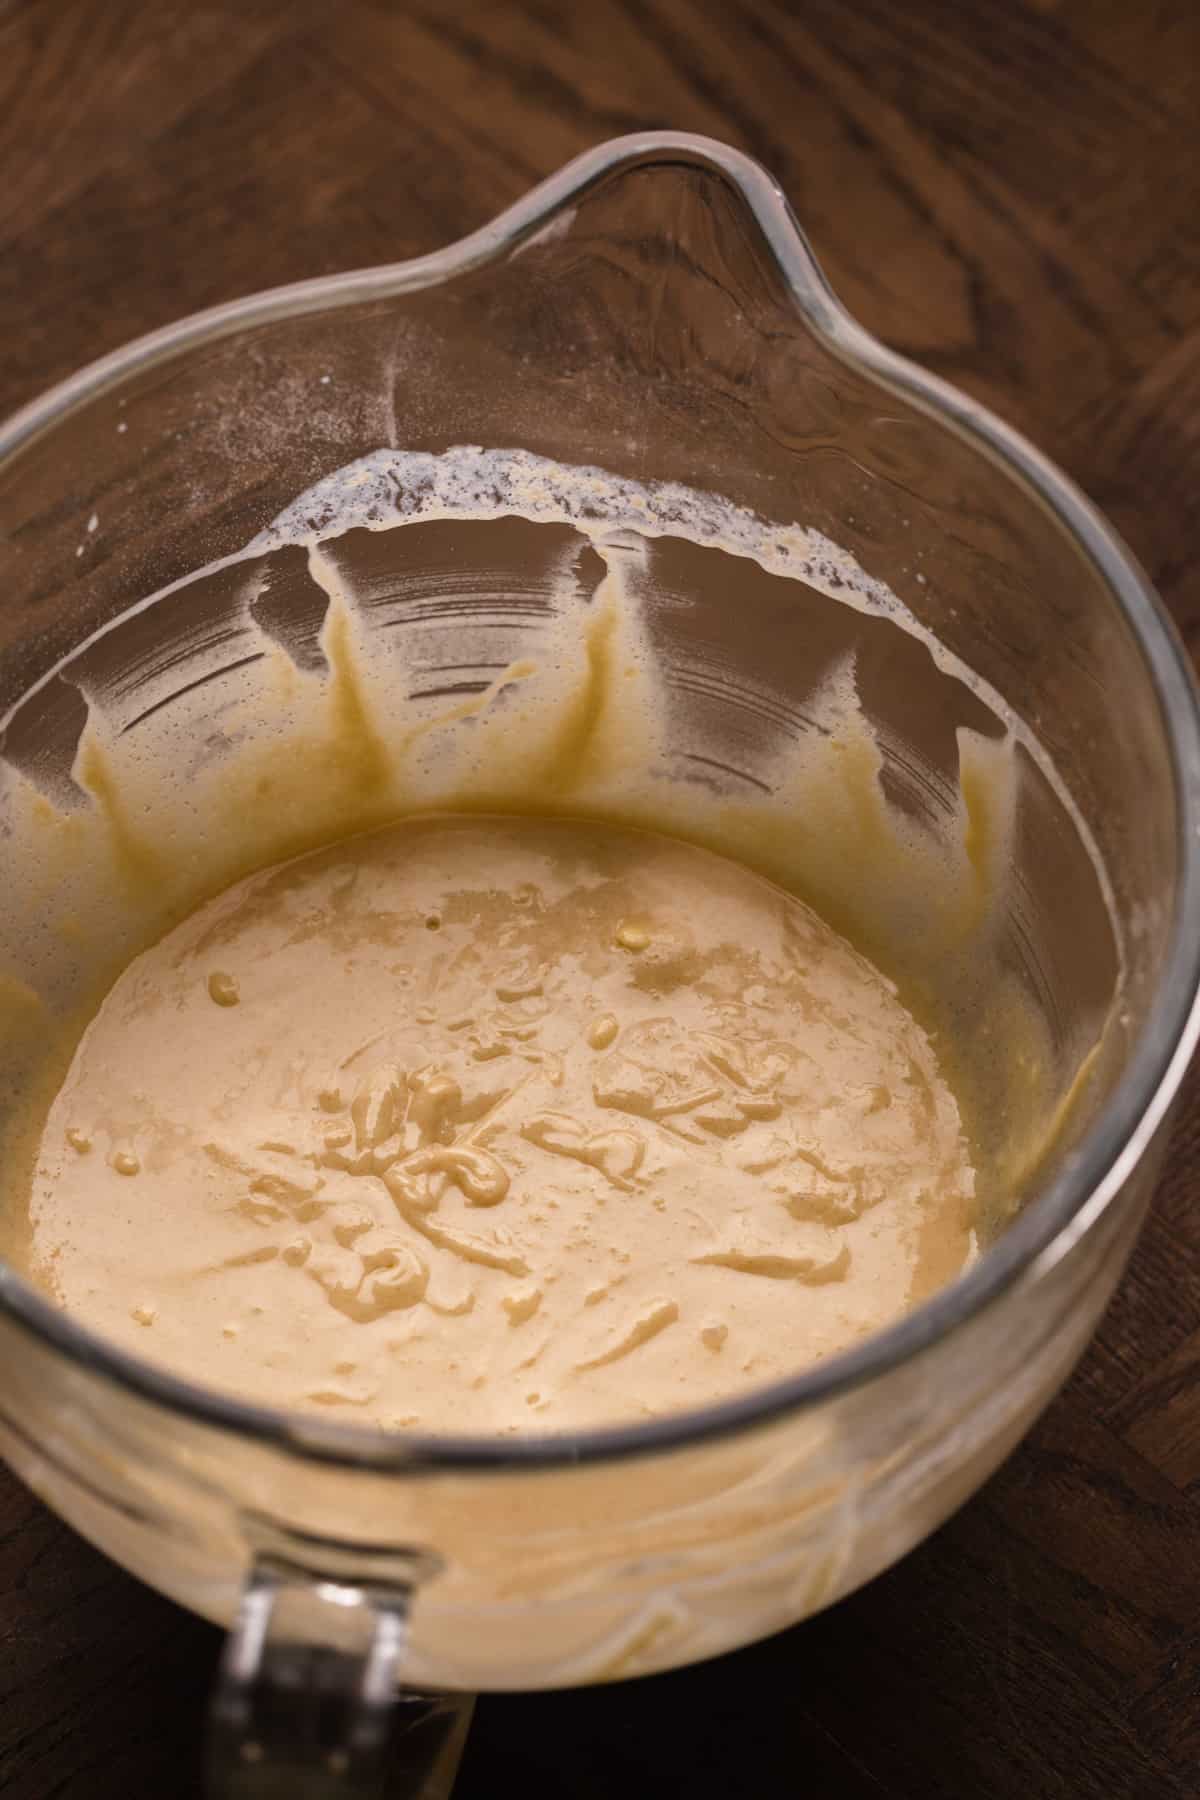
Step 2: Turn the mixer off and add the oil, egg, egg white, and vanilla extract. Mix on low until a batter begins to form. Scrape down the sides of the bowl with a rubber spatula to make sure the eggs are fully incorporated.
Slowly pour in the buttermilk with the mixer running on low until the cake batter is smooth.

Step 3: Evenly divide the batter between the prepared pans. You can weigh it to be as precise as possible, but I just use a large cookie scoop to portion the batter.
Place the pans on the same rack in the center of the oven and bake. The cakes are done when a toothpick inserted in the center comes out clean with a few moist crumbs attached.
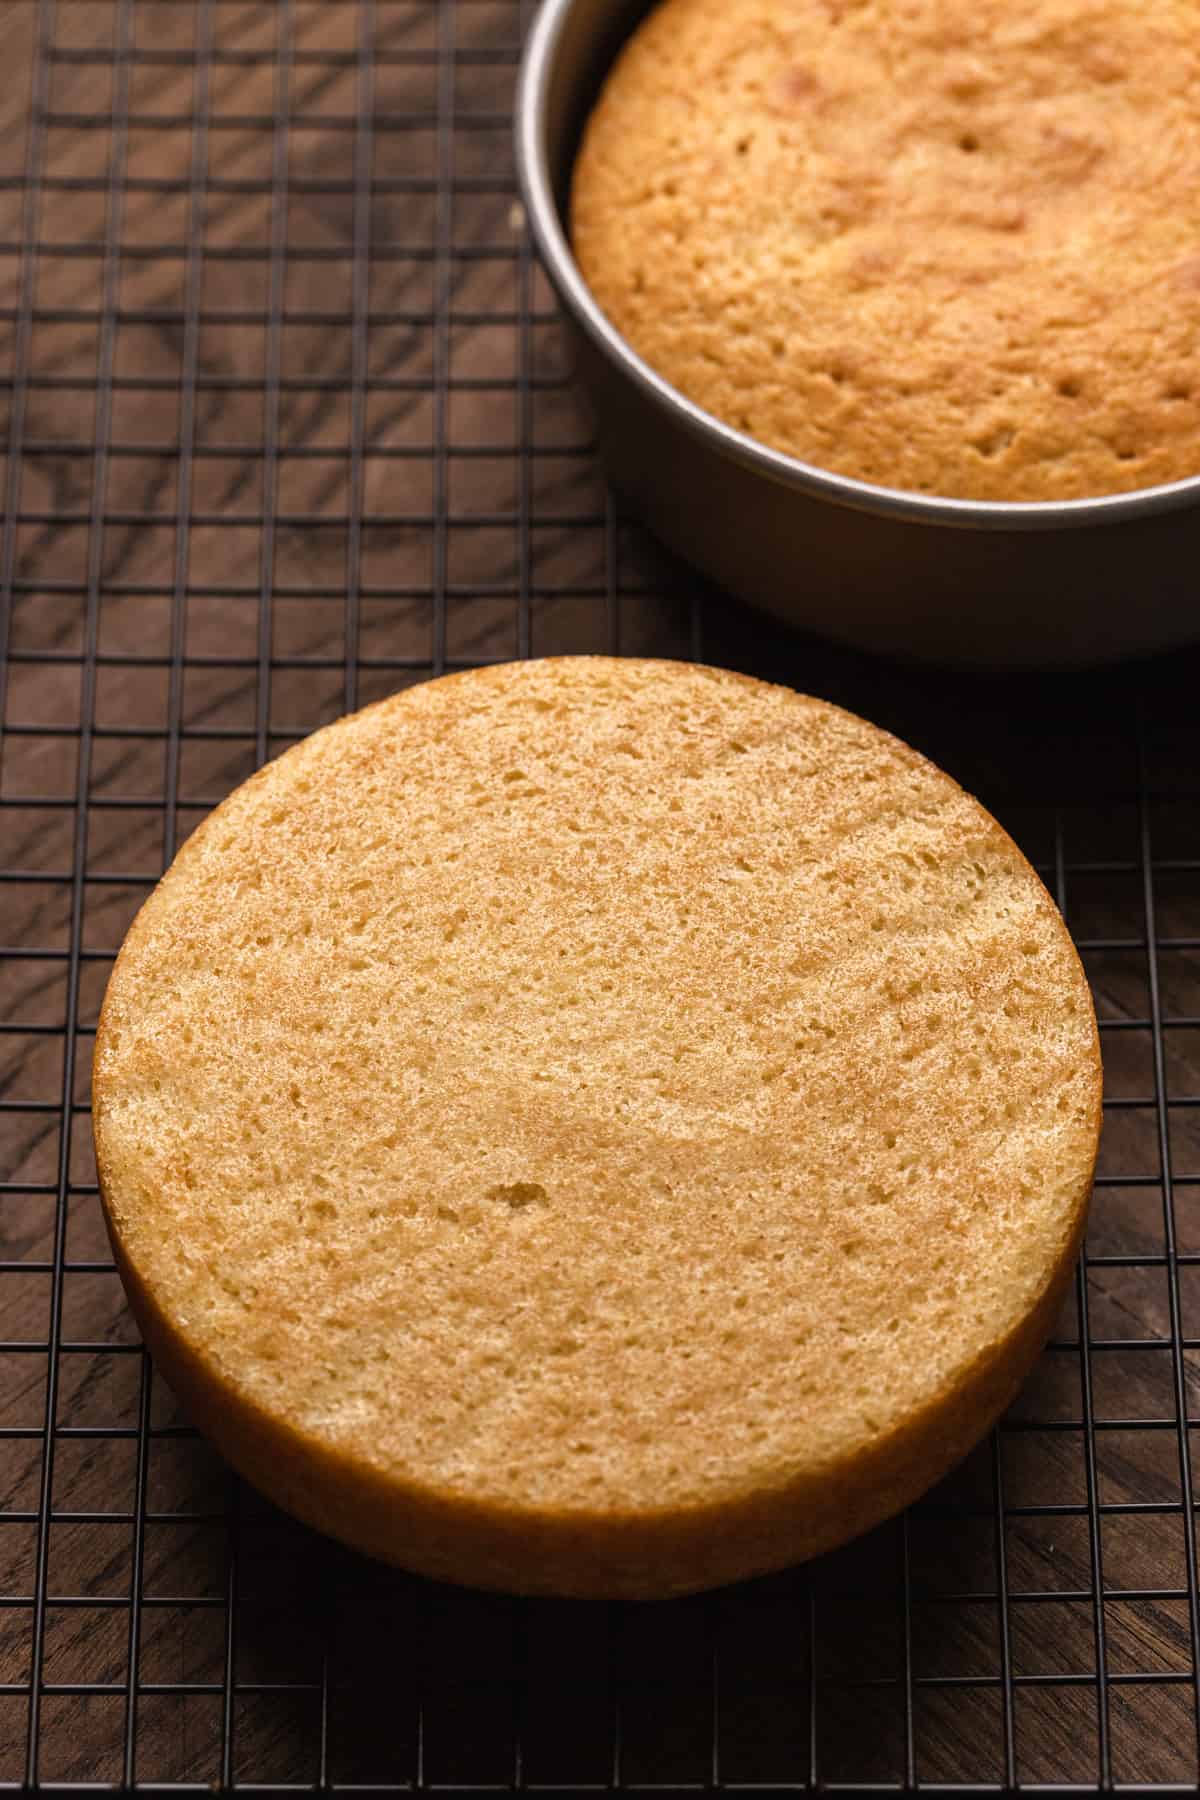
Step 4: Remove the pans from the oven and place them on a wire cooling rack. Let them cool for 20 minutes and then gently turn the pans upside down onto the rack and lifting them up to release the cake.
You can start assembling the cake once the layers reach room temperature, but I like to let the layers chill in the freezer for about 20 minutes. It's easier to decorate a chilled cake.

Step 5: For the frosting, add softened butter and cream cheese to the bowl of a stand mixer or hand mixer. Cream on medium speed until smooth and fluffy.

Step 6: Next, add the powdered sugar 1 cup at a time, mixing on low until everything well combined. Add the vanilla bean paste and mix on medium speed until fluffy.
Assembling the Cake
If the tops aren't flat, use a serrated knife or cake leveler to create a flat surface to make frosting easier and prevent air bubbles from forming between the layers.
Place the first cake layer on a cake stand and spread about 1 cup frosting on it. Place the second layer on top upside down so the top is flat.
Spread a thin layer of frosting all over the cake using your offset spatula and bench scraper. This is a "crumb coat" that locks in loose crumbs, preventing them from mixing into the final layer of frosting.
You can leave the cake like this for a semi-naked look or chill the cake in the refrigerator for 20 minutes and spread a thick final coat of frosting all over it.
Add decorative piping and sprinkles to your mini cake, slice, and enjoy!

Expert Baking Tips
- Use a kitchen scale. I recommend using a food scale for accuracy. If you don't have one, always spoon-measure your flour. Fluff up the flour first before spooning it into your measuring cup- don't pack it in!
- Use room temperature ingredients. Using room temperature eggs, butter, and buttermilk creates a fully blended, smooth batter that will bake up evenly with a uniform texture.
- Don't overmix the batter. Over mixing cake batter will result in a dense cakes with sunken centers. The ingredients should be just barely combined with no dry streaks of flour.
- Wait until the cakes cool to frost. Let the 6-inch cake layers cool completely on the wire rack before frosting. The frosting will melt off if they're too warm!
Storage Instructions
Store the frosted small vanilla cake keeps in a large airtight container, like a cake carrier, in the refrigerator for up to 1 week. Cover the cut section of the cake with leftover frosting to keep it moist.
If you have leftover frosting, store it in an airtight container in the refrigerator for up to 1 week. When you're ready to use it, give it a quick mix to make it soft and spreadable again.
Freezing Instructions
To freeze the whole cake, wrap tightly with plastic wrap and then a layer of aluminum foil to prevent freezer burn. Freeze it as is or in a cake carrier for up to 3 months. Let it thaw in the refrigerator overnight and let it come to room temperature before serving.
To freeze cake slices, wrap each one in plastic wrap and place in a freezer bag. Freeze for up to 3 months. When you're ready to enjoy, unwrap a slice, put it on a plate, and let it thaw on the counter for about 1 hour.
Frequently Asked Questions
You can cut the cake into 6-8 small slices or 4 big ones.
Yes! You can bake the cake layers and store them in the refrigerator for up to 2 days before decorating. You can also freeze them for up to 3 month and let them thaw out the night before assembling.
Yes! You can split the batter between 3 4-inch cake pans to make a mini layer cake. The cakes will take a little less time to bake, so keep an eye on them and start checking for doneness around the 15 minute mark.
I haven't tested it, but you could try using a 1-to-1 gluten free baking flour. Make sure the flour you use is specifically labelled "baking flour", not "all purpose flour".
If you're making the cake gluten free, make sure to vigorously whisk the batter so it rises and gets extra fluffy. After that, let the batter sit for about 30 minutes before baking. Gluten free flour sometimes struggles to absorb moisture, so letting it sit helps thicken and moisten the batter.
More Cakes and Pies to Try


📖 Recipe
Small Vanilla Cake (6-Inch)
Equipment
Need Metric or US Customary Measurements?
Use the buttons below to toggle between grams and cups!
Ingredients
Vanilla Cake
- 1 ½ cup cake flour
- 1 cup granulated sugar
- 1 teaspoon baking powder
- ¼ teaspoon baking soda
- ¼ teaspoon salt
- ⅓ cup unsalted butter room temperature
- ⅓ cup vegetable oil
- 1 large egg room temperature
- 1 egg white room temperature
- 2 teaspoon vanilla extract
- ⅔ cup buttermilk room temperature
Cream Cheese Frosting
- ½ cup unsalted butter softened
- 8 ounces cream cheese softened
- 4 cups powdered sugar
- 2 teaspoons vanilla bean paste
- ¼ teaspoon salt
Instructions
Vanilla Cake
- Preheat the oven to 350 degrees Fahrenheit (180 degrees Celsius). Grease 2 6-inch cake pans with non-stick baking spray, and line them with parchment paper rounds.
- Add the cake flour, sugar, baking powder, baking soda, and salt to the bowl of a stand mixer fitted with the paddle attachment. Mix on low, spinning about 5 times.1 ½ cup cake flour, 1 cup granulated sugar, 1 teaspoon baking powder, ¼ teaspoon baking soda, ¼ teaspoon salt
- Add the butter to the bowl and beat on low for 5 minutes until the texture looks like wet sand.⅓ cup unsalted butter
- Add the oil, egg, egg white, and vanilla extract. Mix on low until a batter forms. Then pour in the buttermilk and mix until well combined.⅓ cup vegetable oil, 1 large egg, 1 egg white, 2 teaspoon vanilla extract, ⅔ cup buttermilk
- Portion the batter evenly between the 2 cake pans. Place the pans on the center rack and bake for 25-30 minutes. The cakes are done when the center springs back after lightly pressing with your finger.
- Remove the cakes from the oven let them cool for 20 minutes on a wire cooling rack. Then, gently turn the pans upside down onto the rack and let them cool to room temperature.
Cream Cheese Frosting
- In a large bowl, beat the softened butter and cream cheese together with an electric mixer on medium-high speed until smooth and fluffy.½ cup unsalted butter, 8 ounces cream cheese
- Gradually add the powdered sugar to the mixture, one cup at a time, beating well on low after each addition.4 cups powdered sugar
- Add the vanilla bean paste and salt and mix on low until well combined.2 teaspoons vanilla bean paste, ¼ teaspoon salt
Assembly
- Assemble the cake when the layers are completely cool. If the cakes have domed tops, level them with a cake leveler or serrated knife.
- Spread a thin crumb coat of frosting over the entire cake. Refrigerate for 20 minutes.
- Once the frosting has firmed cup, cover the cake with another layer of frosting. Pipe a boarder around the cake if desired. Decorate with sprinkles, slice, and enjoy!
Video
Notes
-
- I recommend using a food scale for accuracy. If you don't have one, fluff up the flour first before spooning it into your measuring cup.
-
- Use room temperature eggs, butter, and buttermilk for a fully blended, smooth batter that bakes up evenly.
-
- Don't overmix. Overmixing cake batter will result in a dense cakes with a sunken center.
-
- Wait for the cake layers to cool completely before frosting them. The frosting will melt off if they're too warm.


Benton Quiros
Saved as a favorite, I love your site!