
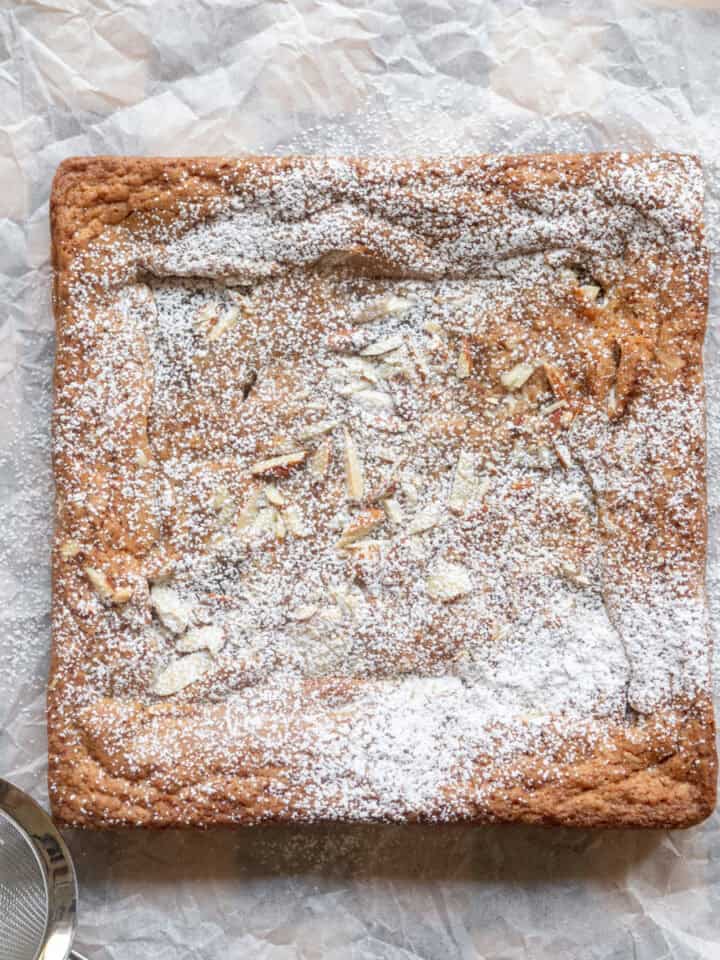
These Oreo red velvet brownies are a decadent twist on your favorite brownie recipe, with a rich, chewy texture and perfect red velvet flavor. The gooey brownie base is studded with Oreo cookie pieces. Perfect for Valentine's Day or any occasion, these brownies will be a new favorite!

Oreo and red velvet is one of my favorite flavor combinations. I already have recipes for Oreo red velvet cake and red velvet Oreo cupcakes on the blog, so I had to make Oreo red velvet brownies next!
These are fudgy brownies that have red food coloring for a signature red hue and white vinegar for a subtle, tangy red velvet flavor. The crunch from Oreo pieces swirled throughout complements the chewy brownie base perfectly.
For more brownie recipes, try these olive oil brownies, brownies with cream cheese frosting, or white chocolate chip brownies next.
Jump to:
Why You'll Love This Recipe
- Chewy red velvet brownies- These brownies aren't cakey at all! Melted butter, an extra egg yolk, and minimal flour make them dense and fudgy.
- Bright red color- The color of the brownies makes this a great recipe for Valentine's Day. Serve them with these red velvet cut-out cookies, red velvet muffins, and no bake red velvet cheesecake for a Galentine's Day party!
- Easy recipe- You can whip up a batch of these brownies in under an hour!
Ingredient Notes
Here are notes about some of the key ingredients. For quantities and full instructions, see the recipe card below.

- Chocolate- I used chopped dark chocolate, but you can also use bittersweet or semi-sweet chocolate. Chocolate bars melt easier than chocolate chips, but chocolate chips still work if they're all you have.
- Unsalted butter- You can make fudgy brownies without oil by using butter! It adds fat to keep the brownies moist and chewy while adding a rich flavor. Leave out the additional salt if you only have salted butter.
- Granulated sugar and brown sugar- Adds sweetness and holds on to moisture. Don't reduce the sugar or the brownies will be dry. Use light brown sugar.
- Eggs and egg yolk- Large eggs bind the ingredients together, and the extra egg yolk adds a little more richness. They need to be room temperature to incorporate evenly into the batter, so pull them out of the fridge 1-2 hours before starting.
- White vinegar- This is a classic ingredient used in red velvet cake to make it a little tangy. White vinegar is best, but you can also use apple cider vinegar.
- Red gel food coloring- Gel food coloring has the brightest red color. You can find it in most grocery stores and craft stores in the baking section. Avoid water-based food coloring.
- All purpose flour- Adds structure to the brownies and a nice chew. There's less flour in these brownies than you'd think, so measure it accurately in grams with a kitchen scale. Too much flour makes brownies cakey.
- Cocoa powder- You can use natural unsweetened cocoa powder or Dutch-processed cocoa powder. Dutch-processed cocoa is treated with alkali, making the flavor and color deeper and richer. If you use Dutch-processed, you'll need more food coloring for the red hue to come through.
- Salt- Use Kosher or sea salt to offset the sweetness and add depth to the flavor profile.
- Oreo cookies- Regular or double stuffed cookies work! You can use a different Oreo flavor if you want (like golden Oreos). Smash them in a bag so you don't need a food processor.
Substitutions and Variations
- Butter substitute- This recipe also works with neutral tasting oil, like canola or vegetable oil.
- Add cream cheese frosting- Red velvet desserts aren't complete without cream cheese frosting! Try topping the brownies with my small batch cream cheese frosting or Oreo cream cheese frosting.
- Add chocolate chips- White chocolate chips or mini chocolate chips are delicious sprinkled on top. They get nice and melty in the oven.
Helpful Equipment and Tools
Bake the red velvet Oreo brownies in an 8X8 or 9X9-inch square baking pan.
Use a light-colored metal pan, like aluminized steel. Metal pans heat up more evenly than glass or silicone, so your brownies will bake evenly and get nice crisp edges.
A stand mixer or handheld electric mixer work for mixing the batter. You have to use a mixer so the sugar dissolves and the eggs get a lot of air incorporated into them for crackly tops!
Step by Step Instructions
Before you start baking, preheat the oven to 350 degrees Fahrenheit (180 degrees Celsius). Line your square baking pan with parchment paper, leaving enough overhang so you can easily lift the brownies out of the pan.

Step 1: Add the chopped chocolate and butter to a medium bowl that is heatproof. Microwave for 1-2 minutes, stirring every 20 seconds to prevent burning. Once melted, stir until smooth and set the bowl aside to cool slightly.

Step 2: In a large bowl, beat the sugars, eggs, egg yolk, vanilla, and vinegar with an electric mixer or stand mixer with the paddle attachment on medium-high speed for 2-3 minutes or until the mixture is foamy and a pale yellow color.
Then mix in the red food coloring on low speed. Add a few more drops for a more vibrant color.

Step 3: Scrape down the sides and bottom of the bowl to fully incorporate the eggs. Turn the mixer on low and stream in the melted chocolate mixture. Mix until well combined.

Step 4: Stop the mixer and add the flour, cocoa powder, and salt. Gently fold I in the dry ingredients with a rubber spatula until there are just a few white streaks of flour left.

Step 5: Add the Oreos to a large Ziploc bag and smash them with a can or rolling pan. Fold most of the crushed Oreos into the brownie batter, leaving some pieces to sprinkle on top of brownies.

Step 6: Spread the batter into an even layer in the prepared pan with an offset spatula. Top with the leftover Oreo pieces.
Bake until a skewer or toothpick inserted in the center comes out with sticky, moist crumbs, but no wet batter.

Step 7: When the brownies are done baking, carefully take them out of the oven and let cool for about 10 minutes. Lift the parchment paper out of the hot pan and transfer the brownies to a wire rack. Let cool completely.
If you're looking for another Oreo dessert, try this Oreo ice cream cake!
Expert Baking Tips
- Use room temperature ingredients. Make sure your eggs are room temperature. This helps the ingredients blend smoothly and gives a better texture to your brownies.
- Don't overmix the batter. Once you add the dry ingredients to the wet ones, mix until just combined. Overmixing can make the brownies tough.
- Check for doneness early. Brownies can go from fudgy to overcooked very quickly. Start checking for doneness about 5 minutes before the suggested baking time by inserting a toothpick into the center. It should come out with a few moist crumbs.
- Chill the brownies for better cuts. After baking, let the brownies cool completely before cutting. This helps to get clean slices.
Storage Instructions
Store Oreo red velvet brownies in an airtight container. They last on the counter for up to 4 days or in the refrigerator for 5-6 days. The Oreos on top will soften as the days go by, but more so in the fridge.
Reheat them in the microwave for 10 seconds or eat at room temperature.
Freezing Instructions
Let the brownies cool completely to prevent condensation from forming, which makes them soggy when frozen.
Cut into squares and wrap each piece in plastic wrap and then aluminum foil to prevent freezer burn.
Place the wrapped brownies in an airtight container or a freezer bag. Freeze for up to 3 months.
When you're ready to enjoy, let the brownies thaw at room temperature for 30-60 minutes. You can also warm them up in the microwave for a few seconds.

Frequently Asked Questions
Yes, you can make the brownies up to a day in advance. Store them in an airtight container at room temperature, or refrigerate for a fudgier texture.
You can omit the food coloring, but the brownies will lose their signature red velvet look. But they still taste delicious!
If your brownies turn out too cakey, you might have overbaked them or used too much flour. For a fudgier result next time, slightly reduce the baking time and measure the flour accurately.
More Brownie Recipes to Try


📖 Recipe

Fudgy Oreo Red Velvet Brownies
Equipment
- 1 Electric hand mixer or stand mixer with the paddle attachment
- 1 square baking pan 8X8 or 9X9-inch
Need Metric or US Customary Measurements?
Use the buttons below to toggle between grams and cups!
Ingredients
- 180 grams chopped chocolate dark, bittersweet, or semi-sweet
- 114 grams unsalted butter
- 200 grams granulated sugar
- 55 grams brown sugar
- 3 large eggs room temperature
- 1 egg yolk room temperature
- 2 teaspoons vanilla extract
- 1 teaspoon white vinegar
- ½ teaspoon red gel food coloring
- 94 grams all purpose flour
- 25 grams cocoa powder
- ½ teaspoon salt
- 16 Oreo cookies
Instructions
- Preheat the oven to 350 degrees Fahrenheit (180 degrees Celsius). Line a square baking pan with parchment paper, leaving 1-2 inches of overhang so you can lift the brownies out.
- Add the chopped chocolate and butter to a medium heatproof bowl. Microwave for 1-2 minutes, stirring every 20 seconds until melted and smooth. Let cool slightly.180 grams chopped chocolate, 114 grams unsalted butter
- In a separate large bowl, beat the granulated sugar, brown sugar, eggs, egg yolk, vanilla, and vinegar with an electric mixer or stand mixer with the paddle attachment on medium-high speed for 2-3 minutes or until the mixture is foamy and pale yellow. Then mix in the food coloring on low speed.200 grams granulated sugar, 55 grams brown sugar, 3 large eggs, 1 egg yolk, 2 teaspoons vanilla extract, 1 teaspoon white vinegar, ½ teaspoon red gel food coloring
- Scrape down the sides of the bowl. Turn the mixer on low and stream in the melted chocolate mixture. Mix until well combined.
- Stop the mixer and add the flour, cocoa powder, and salt. Gently fold them in with a rubber spatula until there are a few white streaks of flour remaining.94 grams all purpose flour, 25 grams cocoa powder, ½ teaspoon salt
- Add the Oreos to a large zip-top bag and smash them with a can or rolling pan. Fold most of the crushed Oreos into the brownie batter, leaving some pieces to sprinkle on top.16 Oreo cookies
- Spread the batter into an even layer in the prepared pan. Top with more Oreo pieces. Bake for 30-36 minutes until a toothpick inserted in the center comes out with sticky crumbs, but no wet batter.
- Carefully take the brownies out of the oven and let cool in the pan for 5-10 minutes. Lift the parchment paper out of the hot pan and transfer the brownies to a wire rack. Cool completely.
- Slice the brownies with a sharp knife and enjoy!


Megan Weimer
These brownies are so thick and chewy! My family ate them within 2 days, they were a huge hit.